Onboarding: initial settings via the alarm dialler
Good to know: You can also complete the onboarding process via a web browser.
After you switch on the dialler for the first time, or after a factory reset, the dialler displays a wizard for the initial settings (onboarding). Follow the on-screen instructions.
1. Select the desired language
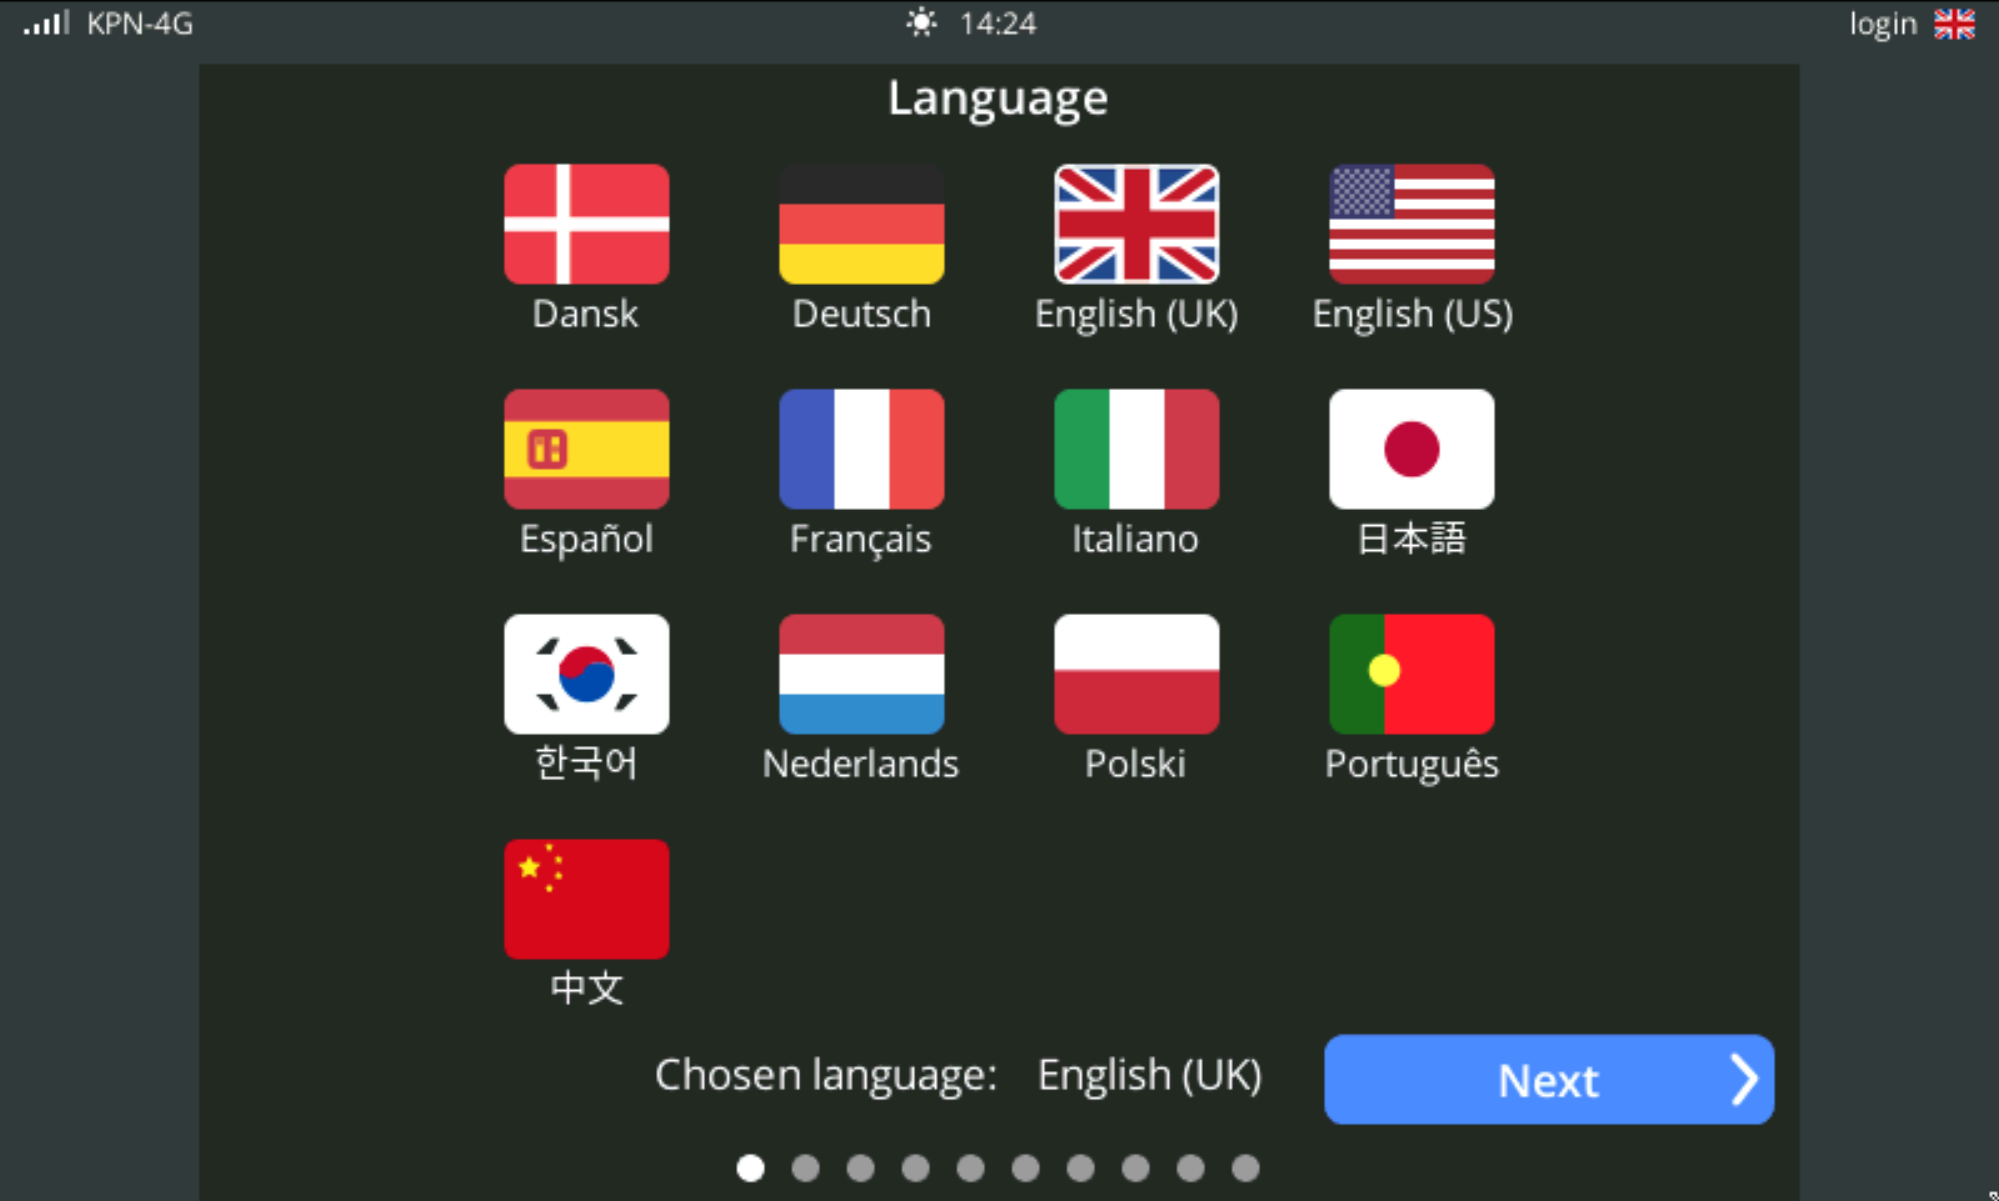
Your selection determines the language in which the alarm messages are spoken. You can only select one language.
For more information, see Settings | Appearance | Language (left-hand side).
2. Select a region and country
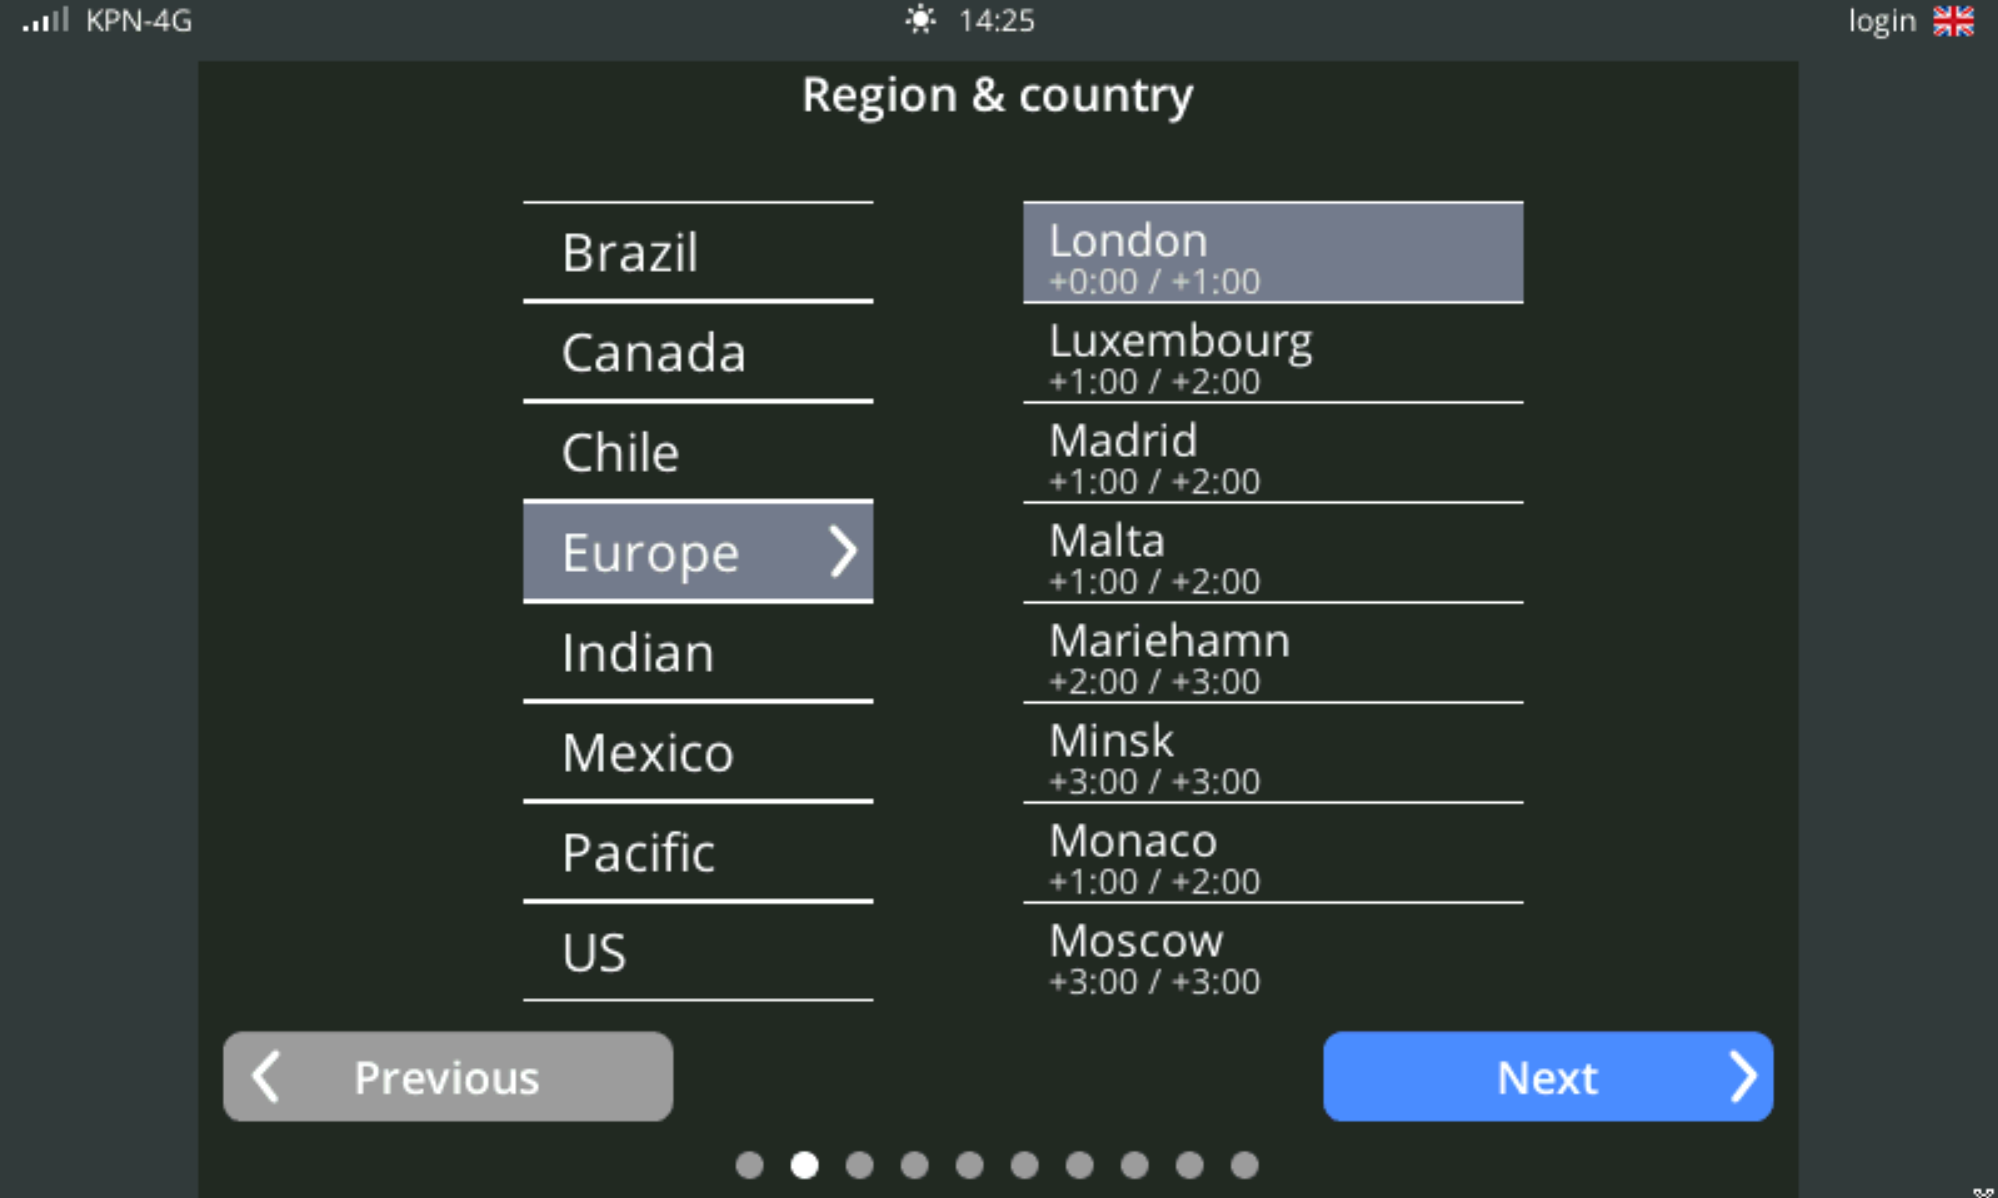
The selected location sets the time zone. For more information, see Settings | Appearance | Language (right-hand side).
3. Set the country code
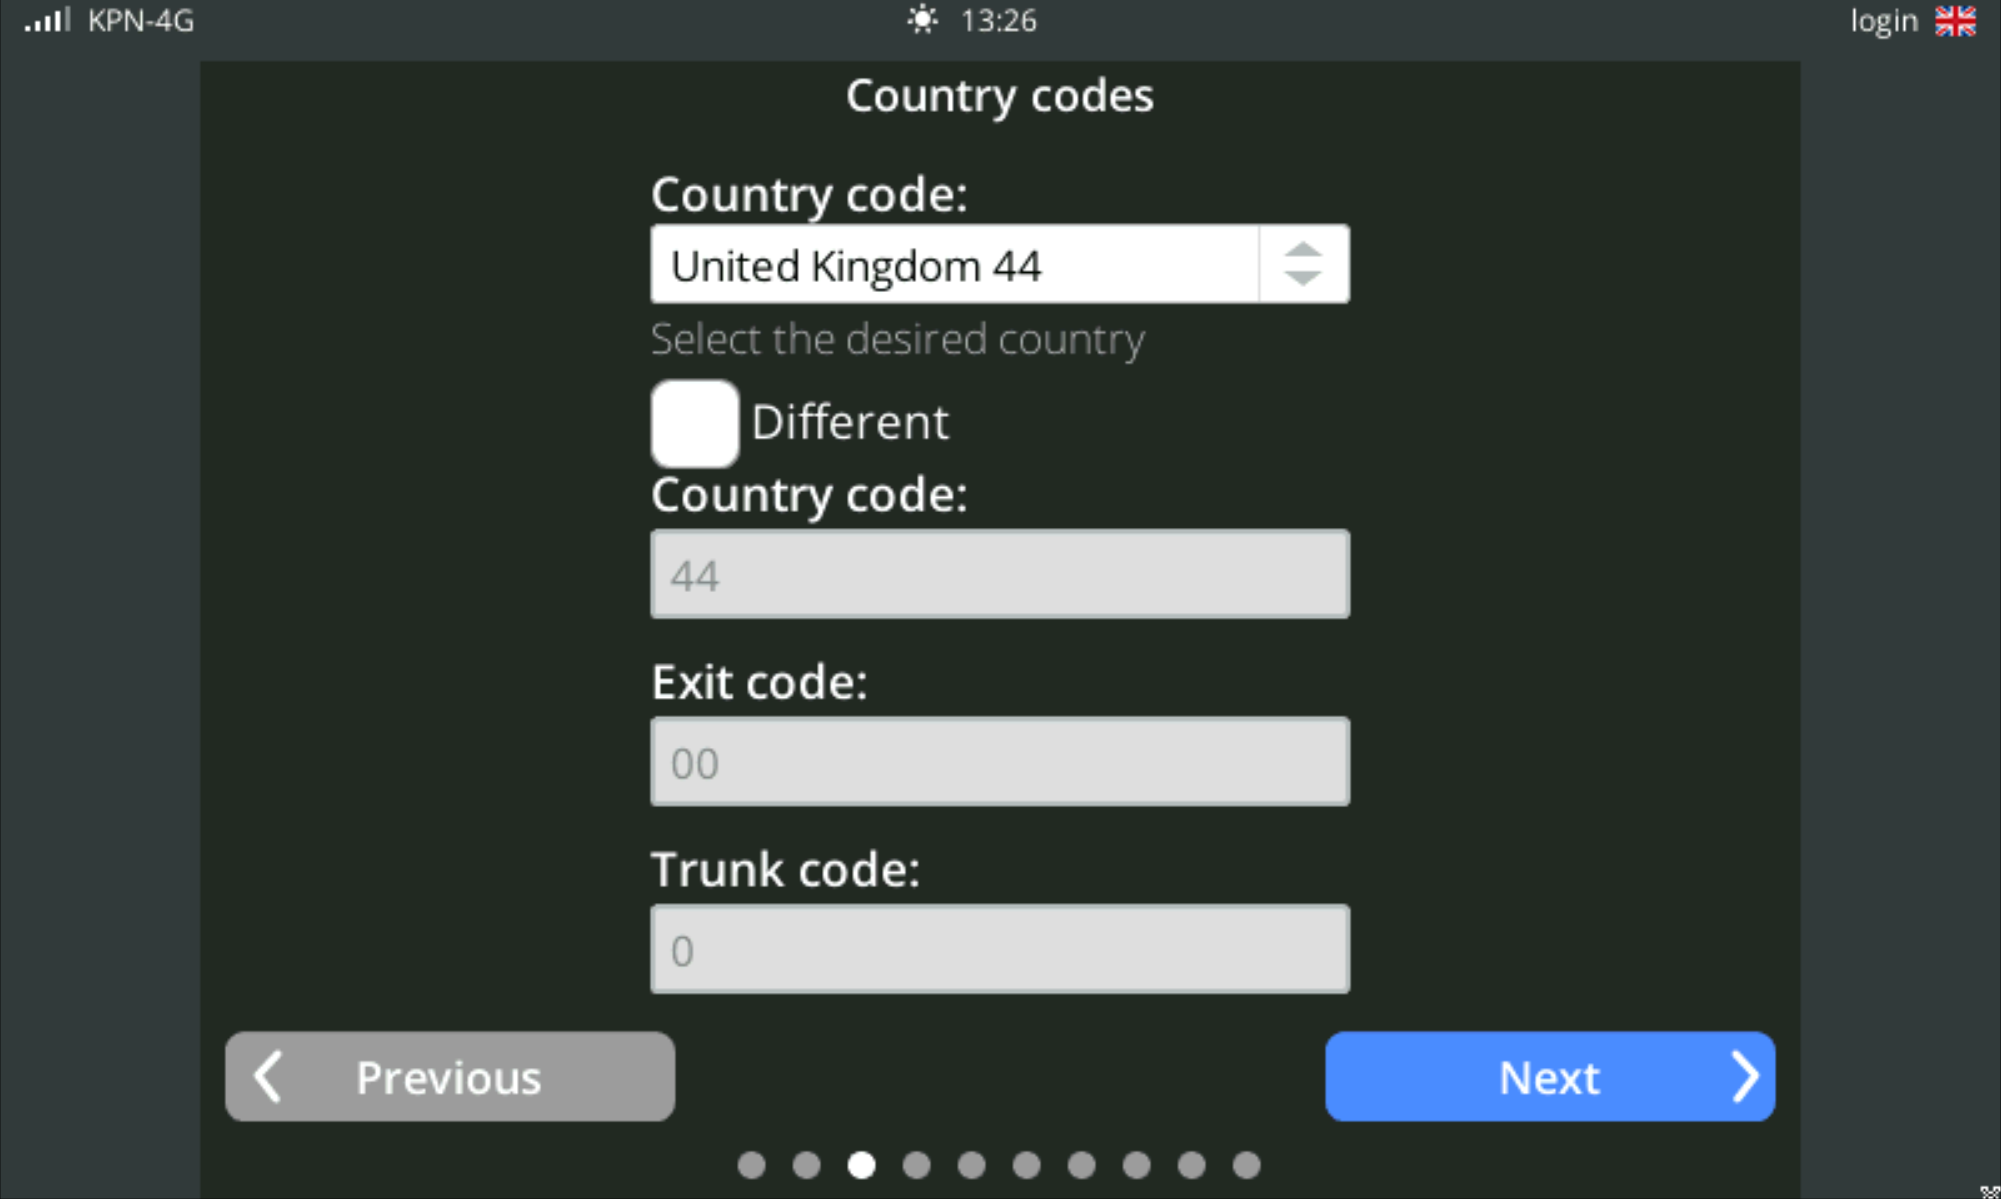
Note: To avoid dial-out problems, we recommend using the default country numbers. Press the double arrows to select the desired country.
See Settings | System | Country Codes for more information on country codes, international, and long-distance access numbers.
4. Change the location name
By default, the location name is set to the dialler type. Change this to a name that helps you recognise the location.
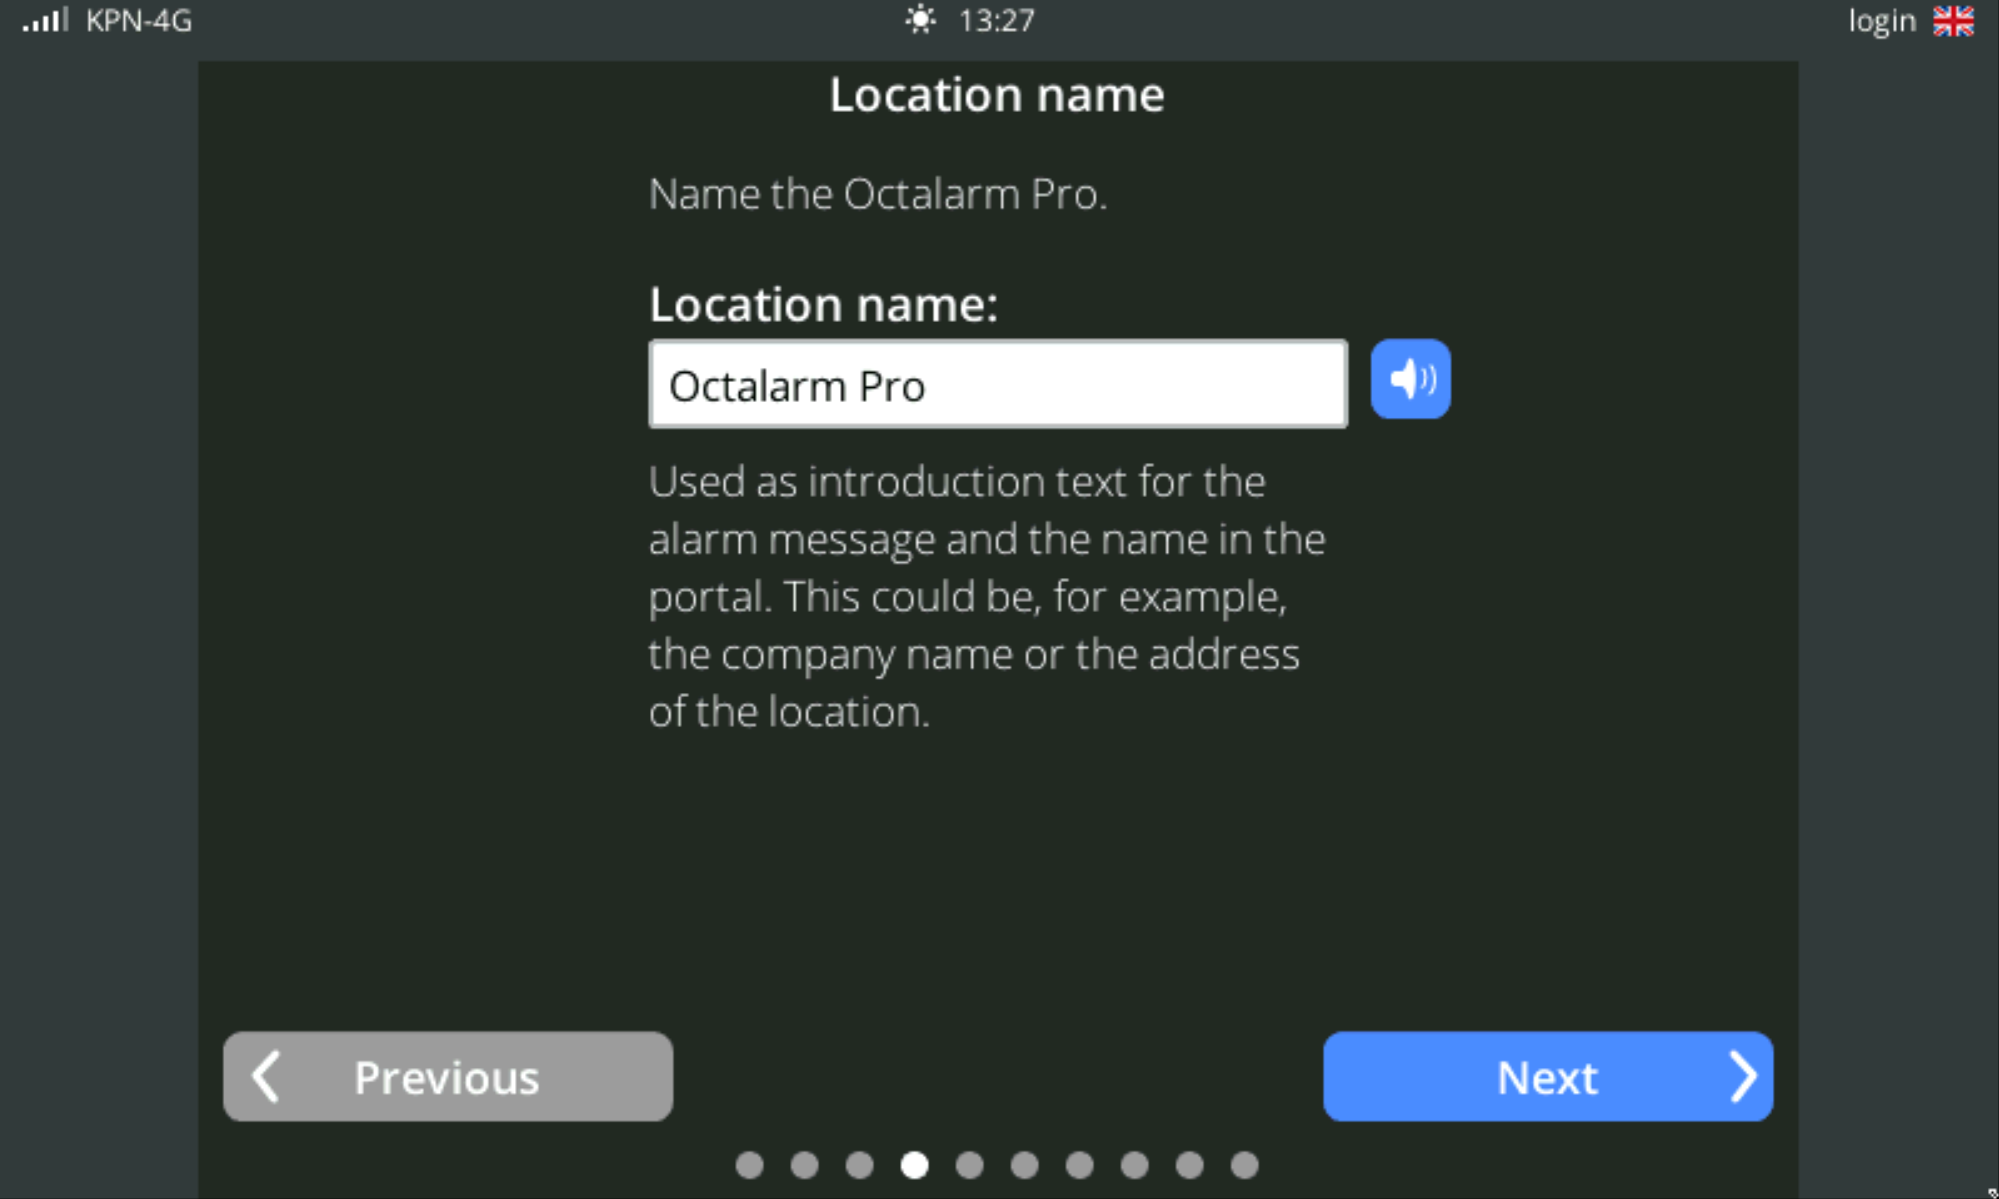
For more information, see Settings | System | Location name.
5. Set up the device installer or administrator
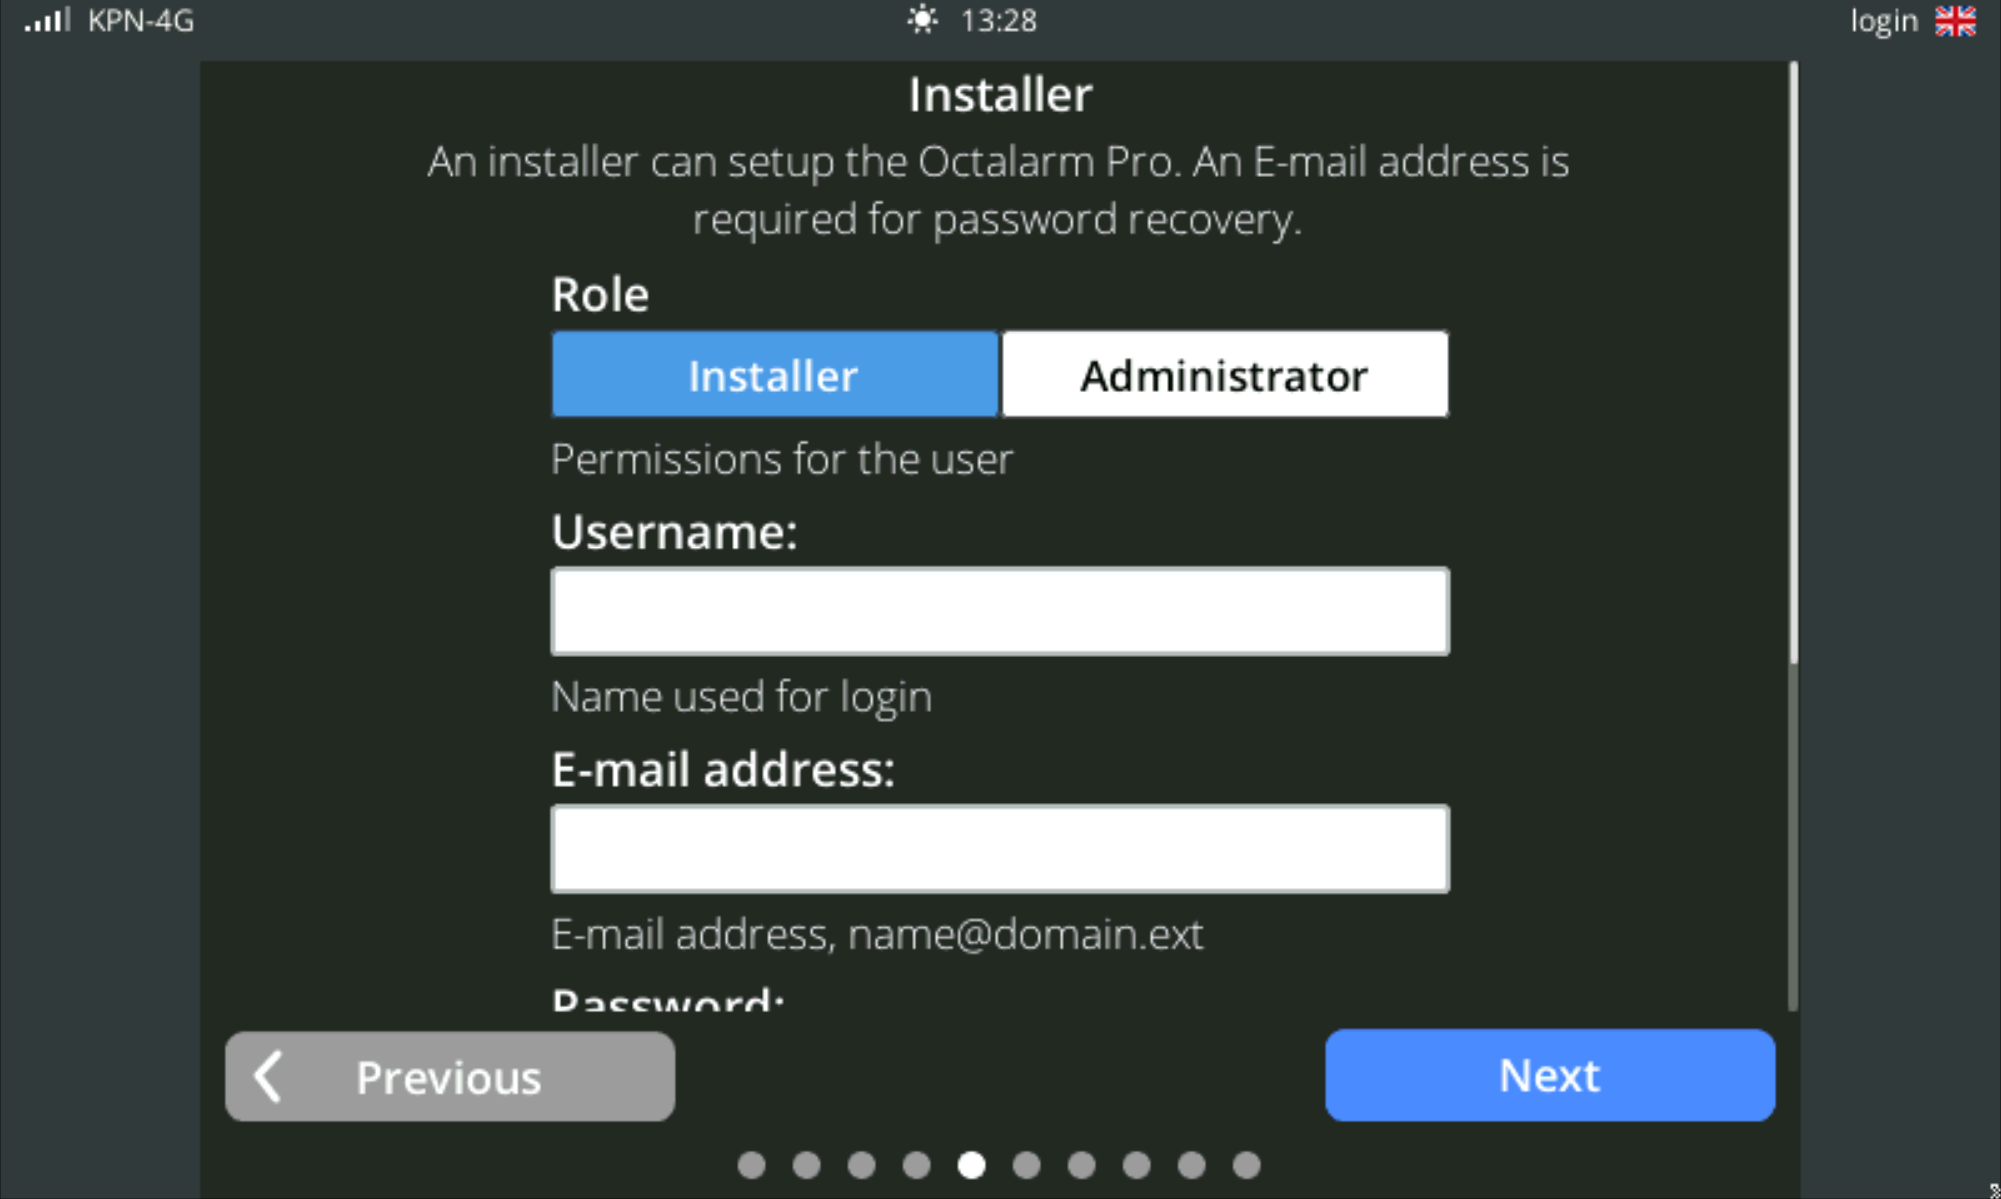
Complete all fields and follow the on-screen instructions. The tag allows the installer or administrator easy access to the dialler. For more information, see Contacts | Add and edit.
6. Optional: subscribe to the Octalarm Connect all-in service
The Octalarm Connect service enables dialling out at low, fixed monthly costs via GSM and/or VoIP.
Tip: If the Octalarm Connect subscription fails (e.g. the message Portal not reachable, Payment failed, etc.), use the portal (https://portal.octalarm.com). See Octalarm Connect for more information on activating Octalarm Connect.
Note: If you choose
Skip, the dialler sets Own server for VoIP and Email. See Settings | Interfaces | VoIP and Settings | Interfaces | Email for instructions on configuring your own SIP and/or SMTP server. If you activate Connect at a later date, remember to manually change the Email and VoIP server settings to Octalarm Portal.
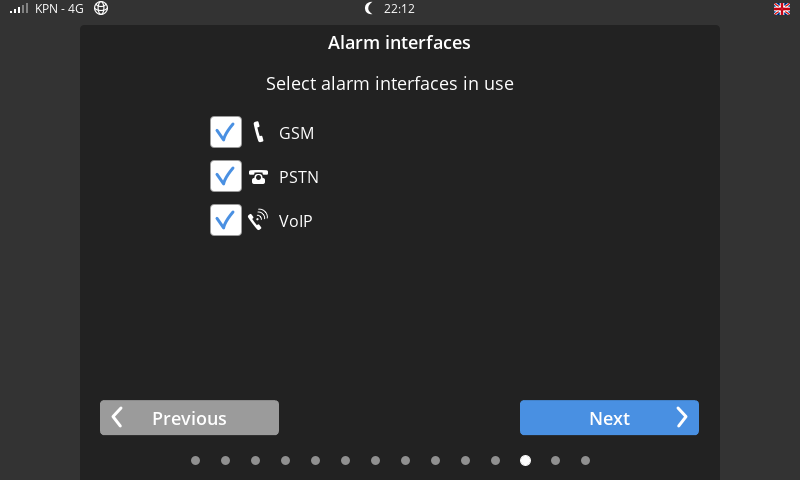
7. Select the alarm interfaces you want to use (GSM, PSTN, VoIP)
8. Use the FREE Adésys Alarm App
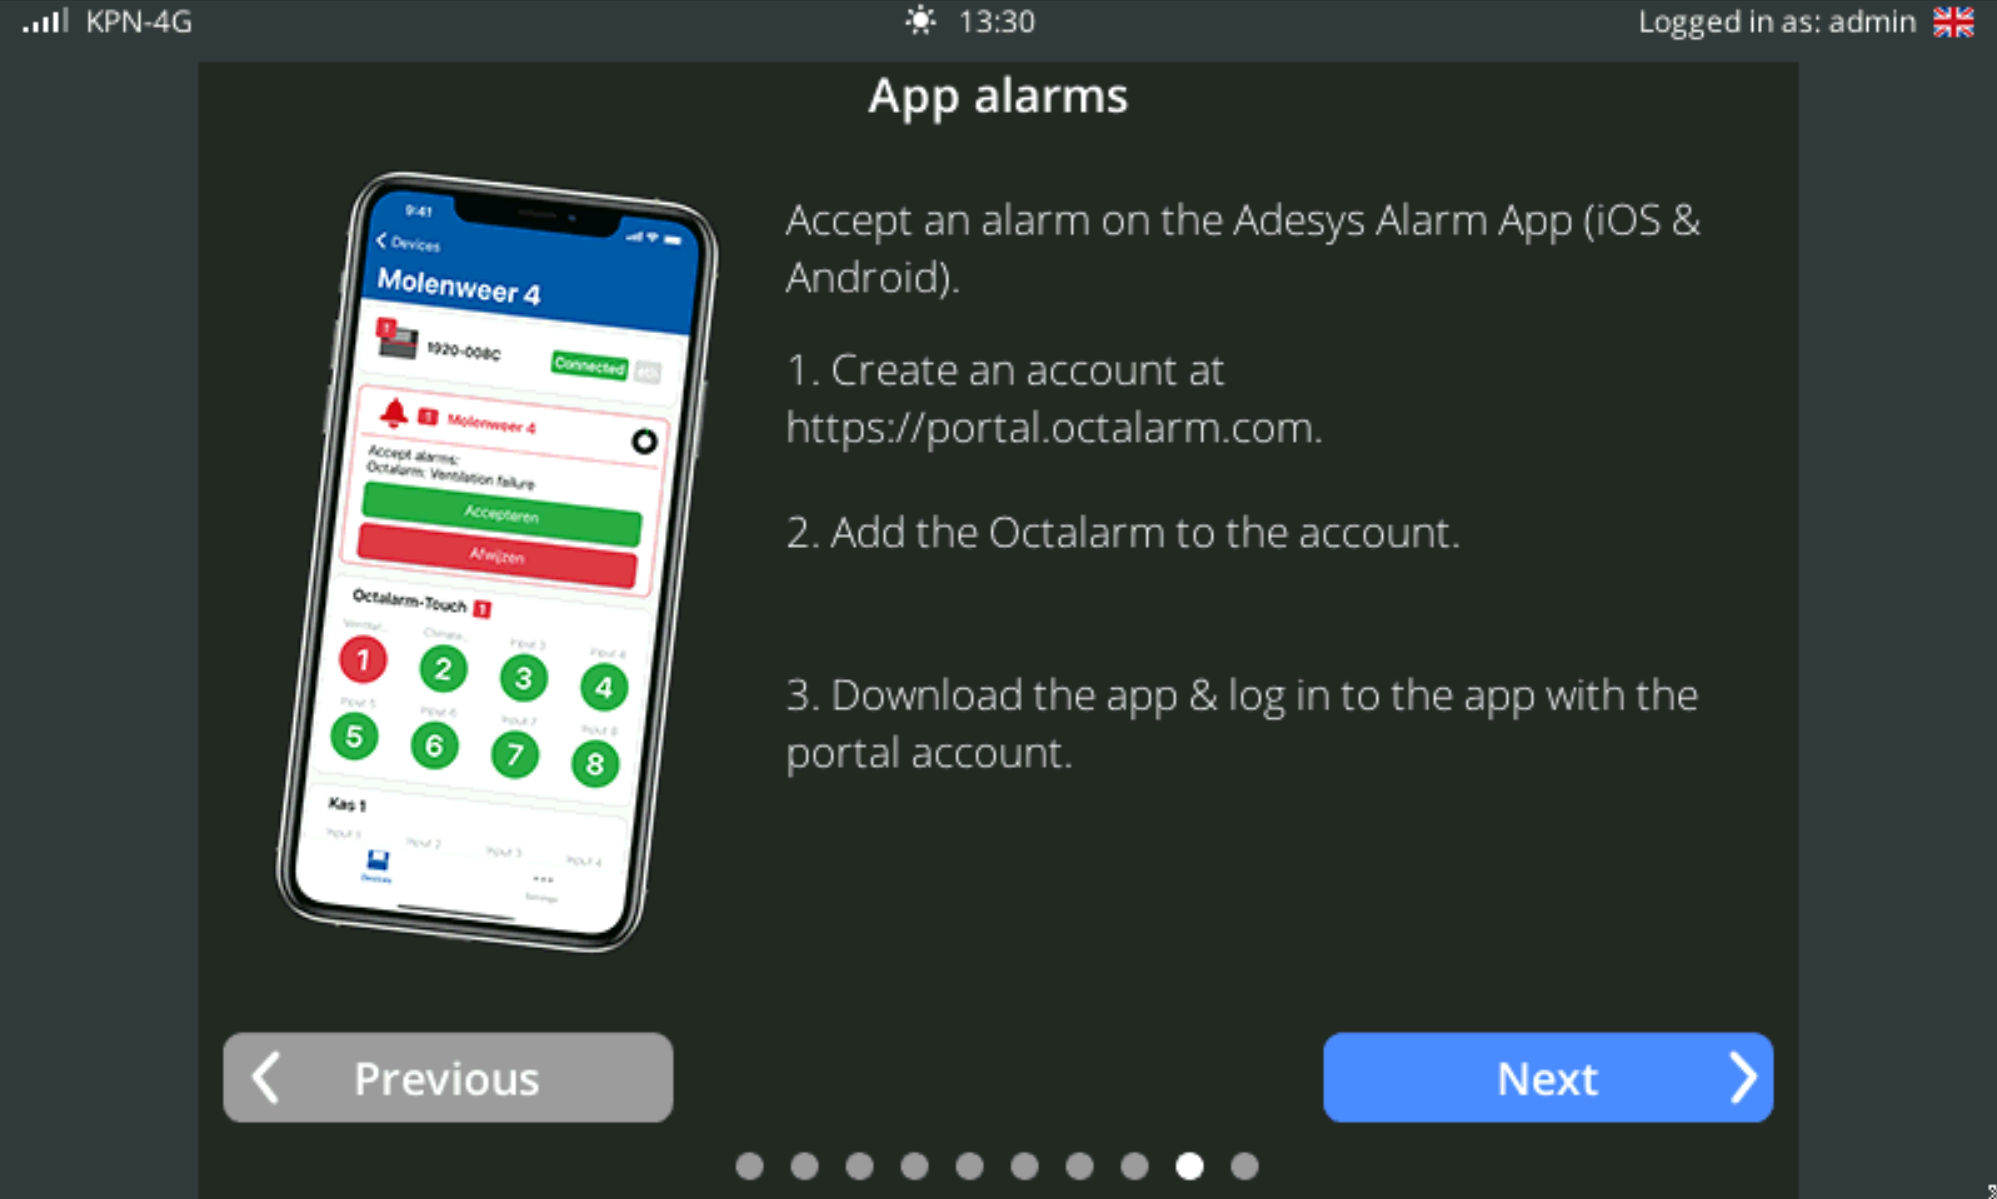
For more information about the free app, see Adésys Alarm App.
All finished!
You have now completed the initial settings. Click Finish to activate the Octalarm alarm dialler.
Note: Abruptly removing the power cable and battery may, in rare cases, cause the system to malfunction and stop working. Always shut down the dialler in a controlled manner.