 Example A: duty schedule menu
The first service group is always open. The other service groups are closed by default. Open them by clicking on the grey bar.
Configure a duty schedule
In this example, create three shifts: Daytime, Nighttime and Weekend.
Shift Daytime
- Go to
Duty scheduleand clickAdd, or click the desired start date in the schedule.
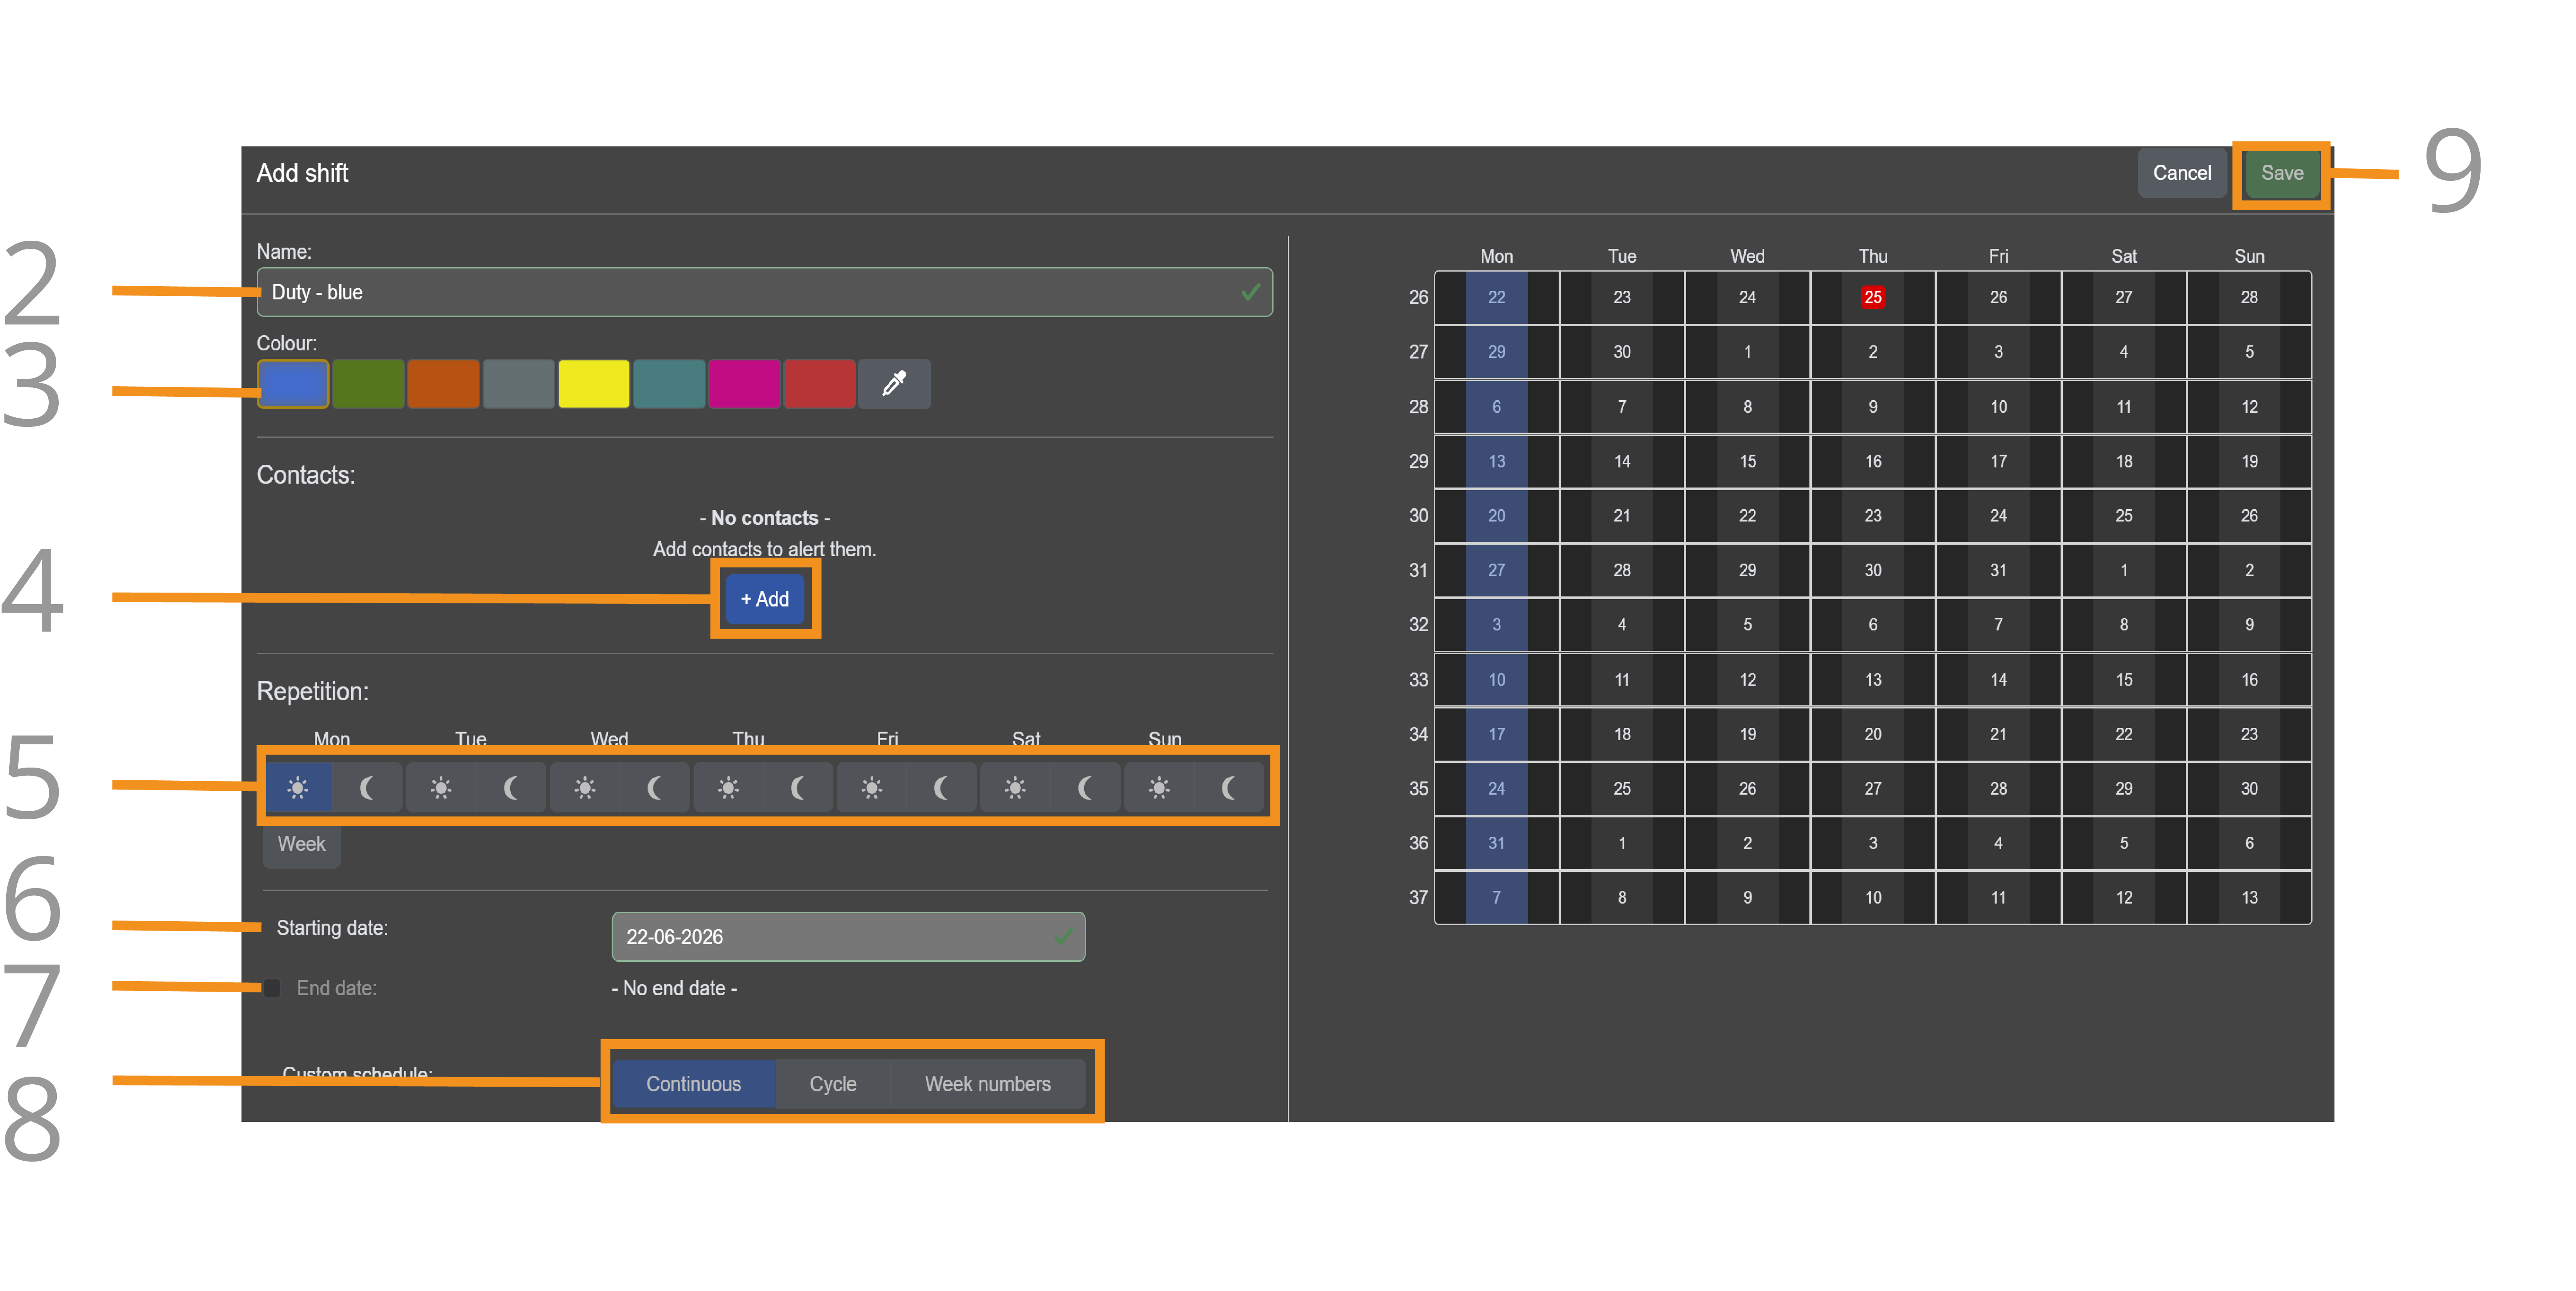
- Give the shift the name Daytime.
- Choose a unique colour; in this example, blue.
- Click
Addand set the contacts as described in the scenario description. The dialler calls from top to bottom, so place the contacts in the correct order. - Configure which day blocks this duty will be active:
- Tick Daytime for all working days.
- Do not tick Nighttime.
- Tick Daytime on Saturday as well (staff work Saturday morning).
- Set the starting date.
- Leave the end date empty (the shift continues).
- Leave custom schedule set to
Continuous.
Check the calendar on the right to confirm that the shift is active at the intended times.
- Click
Save.
Shift Nighttime
Create the shift Nighttime in the same way as the shift Daytime. Change the following:
- Name: Nighttime.
- Colour: green.
- Contacts: choose the contacts for the Nighttime shift (see the scenario description).
- Day blocks: tick only Nighttime. Do not tick Saturday night; that falls under the weekend.
- Starting date: set the start date.
- End date: leave the end date empty.
- Custom schedule: leave this set to
Continuous. - Click
Save.
Shift Weekend
Create the shift Weekend in the same way. Change the following:
- Name: Weekend.
- Colour: yellow.
- Contacts: choose the contacts for the weekend shift (see the scenario description).
- Day blocks: tick Saturday night, Sunday daytime, and Nighttime.
- Starting date: set the start date.
- End date: leave the end date empty.
- Custom schedule: leave this set to
Continuous. - Click
Save.
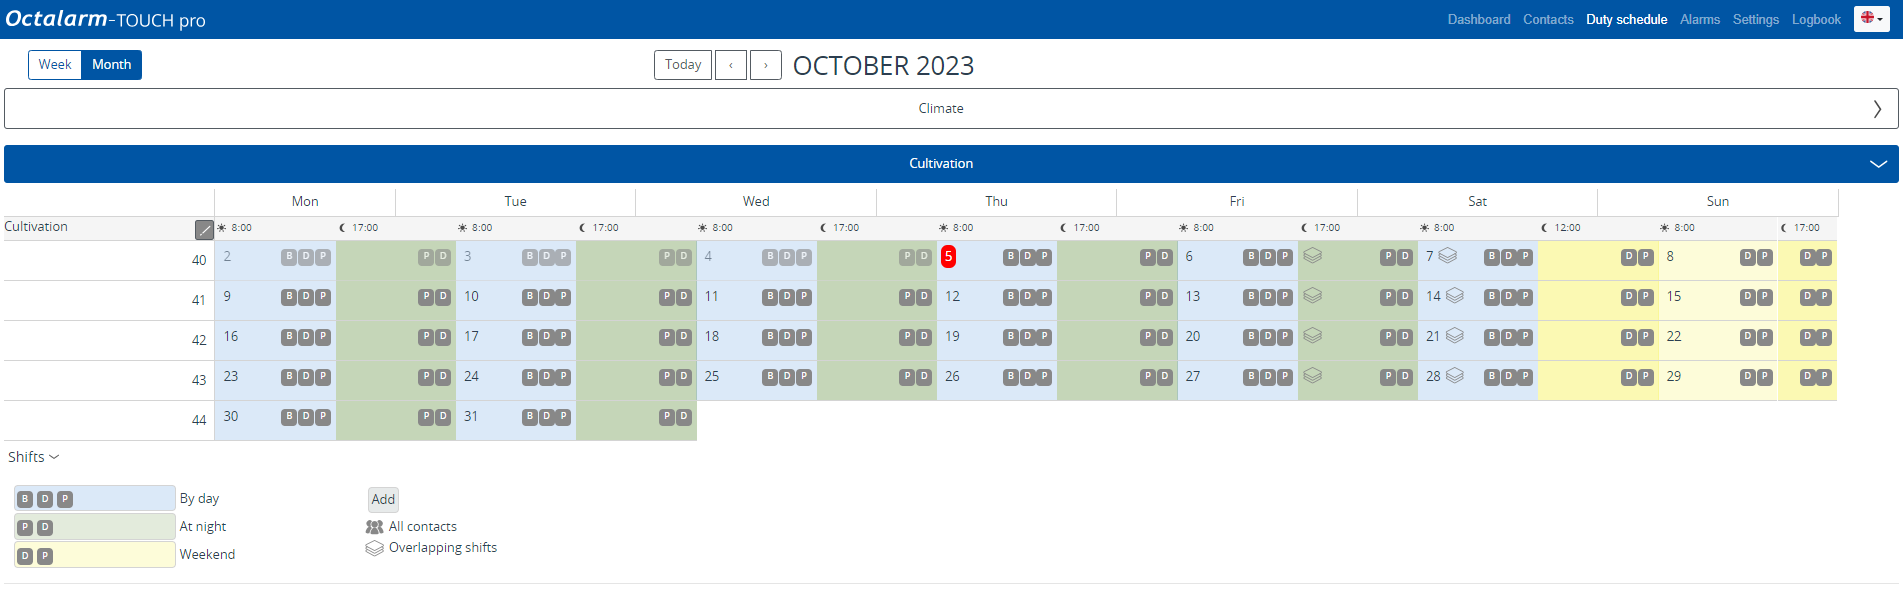
Result of the duty schedule
These 3 shifts create the following schedule (week overview):
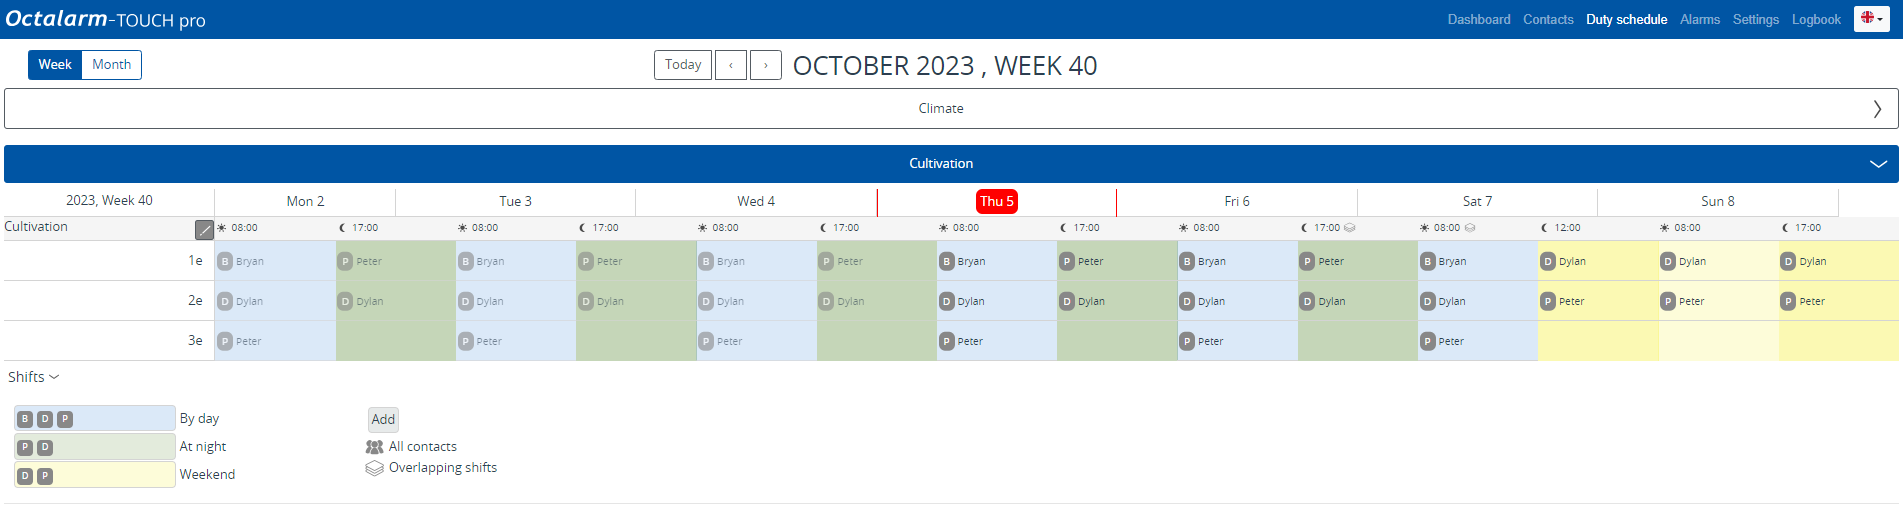
This schedule has the same pattern every week. This is particularly clear in the month overview.
Good to know:
- Change a duty retrospectively:
- Option 1: click an existing duty in the calendar, adjust the settings, and click
Save.- Option 2: in the legend, click a duty, click
Edit, adjust the settings, and clickSave.- Show duties in the legend:
in the legend, click>behind Shifts.- View overlapping duties:
in the calendar, right-click the Overlapping shifts symbol. You then see which duties are active; the first duty listed is active.