 Ex B: service groups menu
In this example, we need 2 service groups: Cultivation and Laboratory.
Set Up Service Group
Service group Cultivation
- Go to
Contactsand click onService groups. - Click
Add.
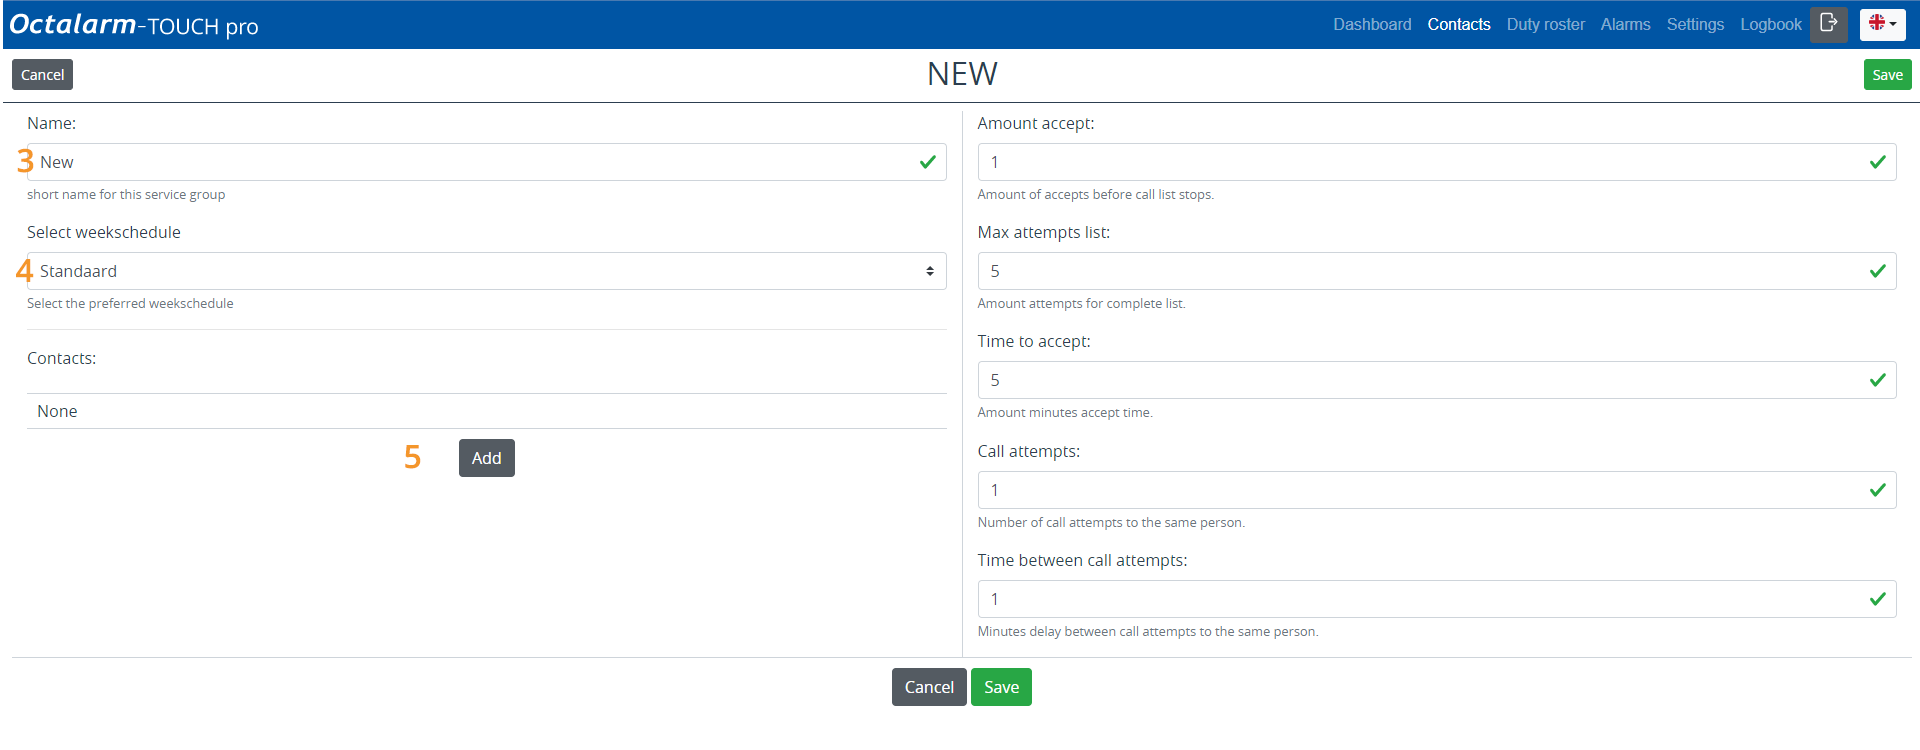
- Give the service group an appropriate name; in this example Cultivation.
- Select the appropriate weekly schedule; in this example, we will use Standard.
- Click
Addand add the contact Dylan. - Select the desired call media: App alert and Voice alert.
- Check the call sequence and adjust if necessary. Keep in mind personal preferences as indicated in the situation sketch.
- If necessary, set a time to accept for each call medium and specify when you want to use this call medium: App alert with Time to accept for Day and Nighttime | Voice alert without Time to accept for Nighttime.

Good to know: the dialler first uses all set call media of one contact before it alarms the next person.
- Click
Save.
Repeat steps 5 to 9 for contacts Bryan and Peter. Keep in mind personal preferences as indicated in the situation sketch. The dialler uses the order of contacts in the service group only if no services have been created in the duty roster.
The service group Cultivation then looks as follows:
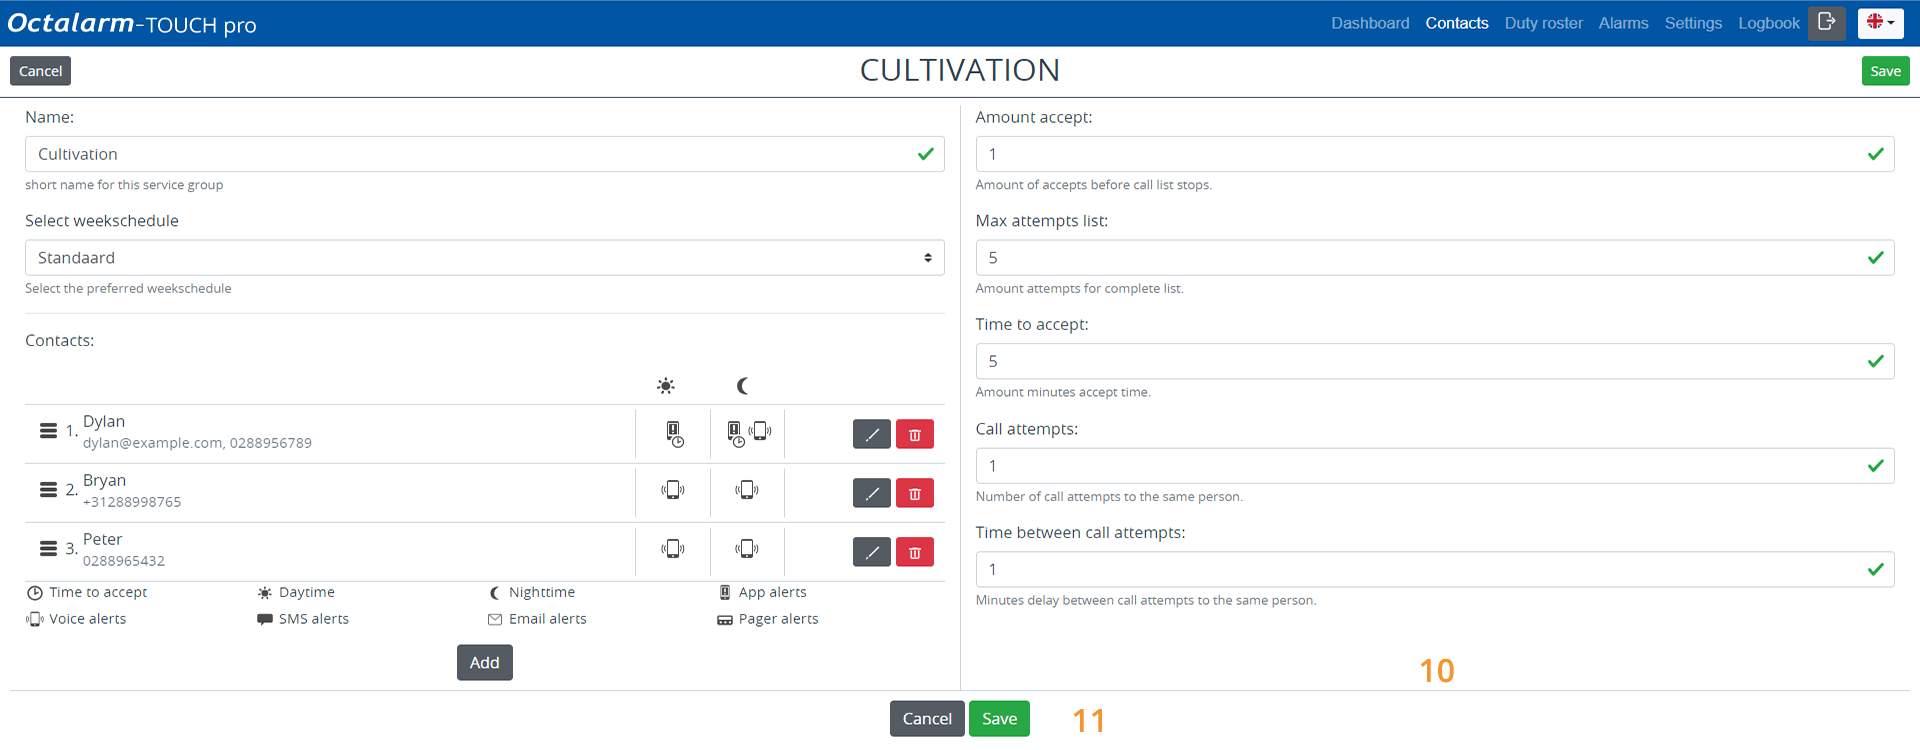
- If necessary, change the Number of acceptances, the Max. attempts list, Acceptance time, the Call attempts and the Time between call attempts. See Contacts|Call lists for further explanation.
- Click
Save.
Service group Laboratory
Creating the service group Laboratory is done the same way. Repeat ALL steps under service group Cultivation, setting
- the name Laboratory;
- choosing the week schedule Laboratory;
- adding contact John;
- setting call medium App alert and Voice alert.
Repeat steps 5 to 9 for contact Danny. Keep in mind personal preferences as indicated in the situation sketch.
The service group Laboratory then looks as follows:
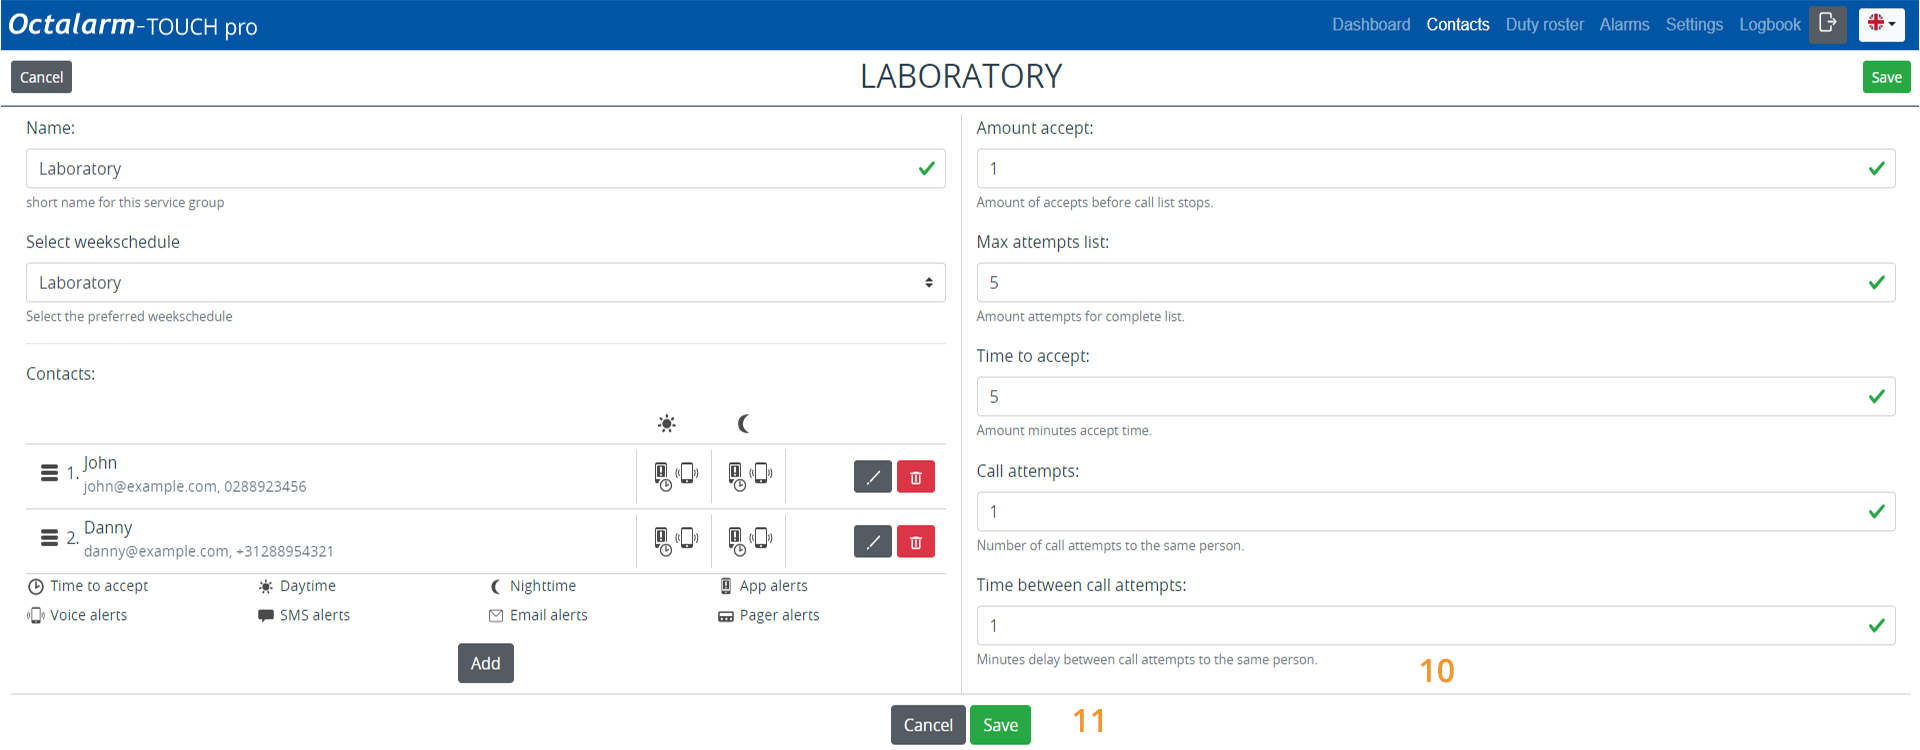
- If necessary, change the Number of acceptances, the Max. attempts list, Acceptance time, the Call attempts and the Time between call attempts. See Contacts|Call lists for further explanation.
- Click
Save.