EM-8001 (expansion module)

You can use the EM-80011 to expand the number of inputs from 8 to 16, 24, 32, or even 40.
- For information on installing, mounting, and connecting the external IO-module, see the Quickstart EM-8001.
- For details on safety regulations, storage and transport, defects and repair, recycling and disposal, or warranty and liability, refer to Legislation and regulations.
Good to know:
- You require software version 2.1.1 or higher to connect 1 or 2 external modules.
- You require software version 2.7.1 or higher to connect 3 or 4 external modules.
Configuration
- From the dashboard, go to
Settings|External modules. - Click
Edit. You now have 2 options:
1. Add automatically (only possible via the dialler)
- Click
Scan. After a few seconds, the linked modules appear. - Click the edit icon (
 ) and:
- Enter a clear name; the system displays this name in the call and in the logbook.
- Note that the client ID is assigned automatically. You can change this if necessary.
- Click
Edit. - Click
Backto exit the menu.
2. Add manually (possible via the dialler and via remote setup)
- Click
Add. - Enter a clear name; the system displays this name in the call and in the logbook.
- Select the client ID you chose when connecting.
Good to know: The number of times the LED flashes at Status on the EM module indicates the client ID to which the module is connected.
- Click
Add.
Editing settings
Good to know:
- To change the name or client ID, use the pencil icon (
- To remove a module you no longer need, use the waste bin icon (
).
Note: If you delete an EM-8001, you also delete all settings made for this external IO-module.
Relay switching
The EM-8001 can switch a relay during an alarm. You can configure this relay as External buzzer, Strobe light or Switchable. The circuit follows the alarm dialler. See Settings | System | Outputs for further setup.
Input status
The EM-8001 features LEDs that indicate the status of each input:
| LED | Status |
|---|---|
| Off | Disabled |
| Green | Rest |
| Red | Active alarm |
| Red flashing | Recovery delay |
| Orange | Accepted |
| Orange flashing | Alarm delay |
Modified alarm dialler screens
Dashboard
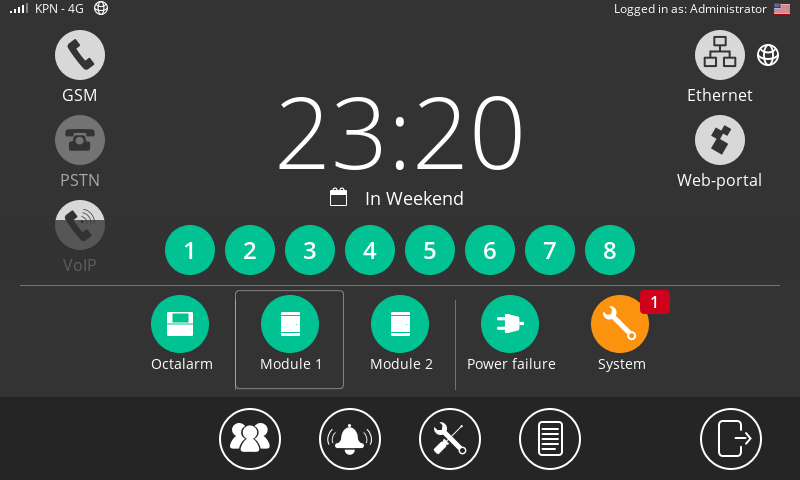
- The eight inputs on the dialler have been replaced by icons for the alarm dialler and the linked modules.
- Disabled alarms are displayed via a separate button. This button disappears automatically when no disabled alarms remain.
Alarms
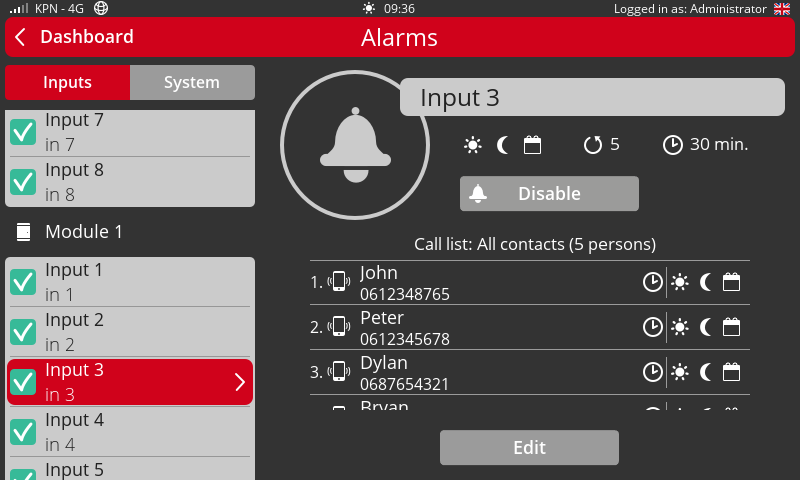
The system adds the alarm inputs of the external module(s) under Alarms. You can configure these inputs in the same way as the dialler’s alarms. See Alarms | Configure inputs for further explanation.
Logbook
The logbook shows to which device the notifications belong; for example, Octalarm, module 1, module 2, or the associated name.
-
Not applicable to ARA. ↩