 Ex B: Duty schedule menu
The first service group is always open. The other service groups are closed by default. Open them by clicking on the grey bar.
Configuring Duty schedule
In this example, there is no difference in call sequence for Daytime, Nighttime or Weekend. However, the first point of contact alternates weekly.
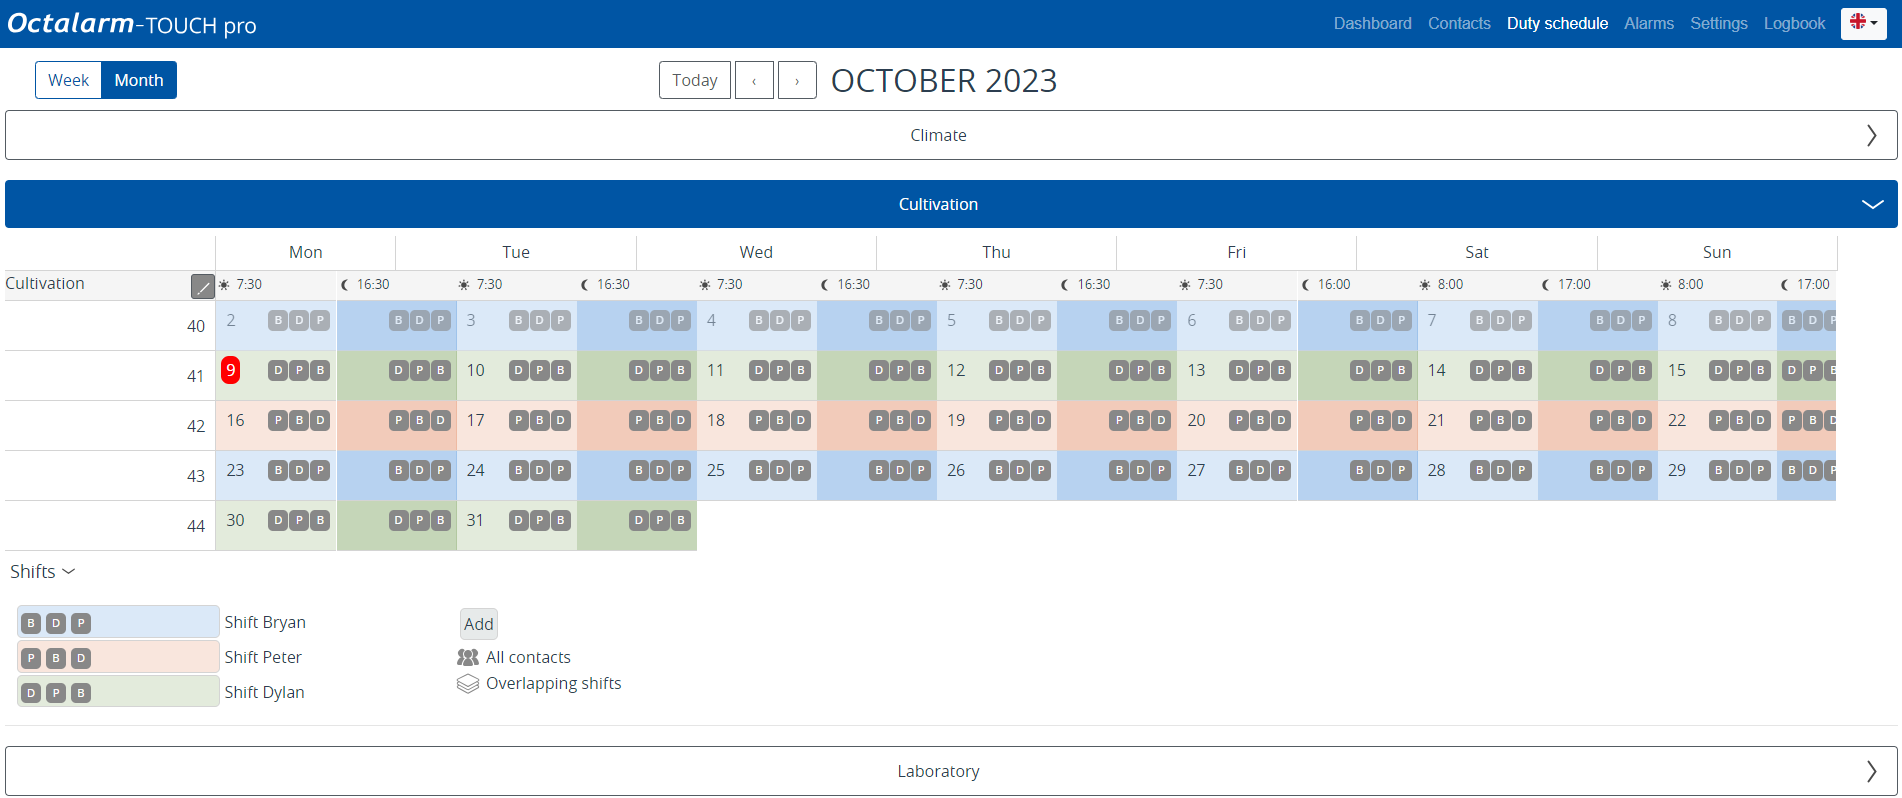
Duty schedule Cultivation
With three contacts, three duties are needed: Bryan’s duty, Dylan’s duty and Peter’s duty.
Bryan’s Duty
- Go to
Duty scheduleand clickAddor the desired start date in the schedule.
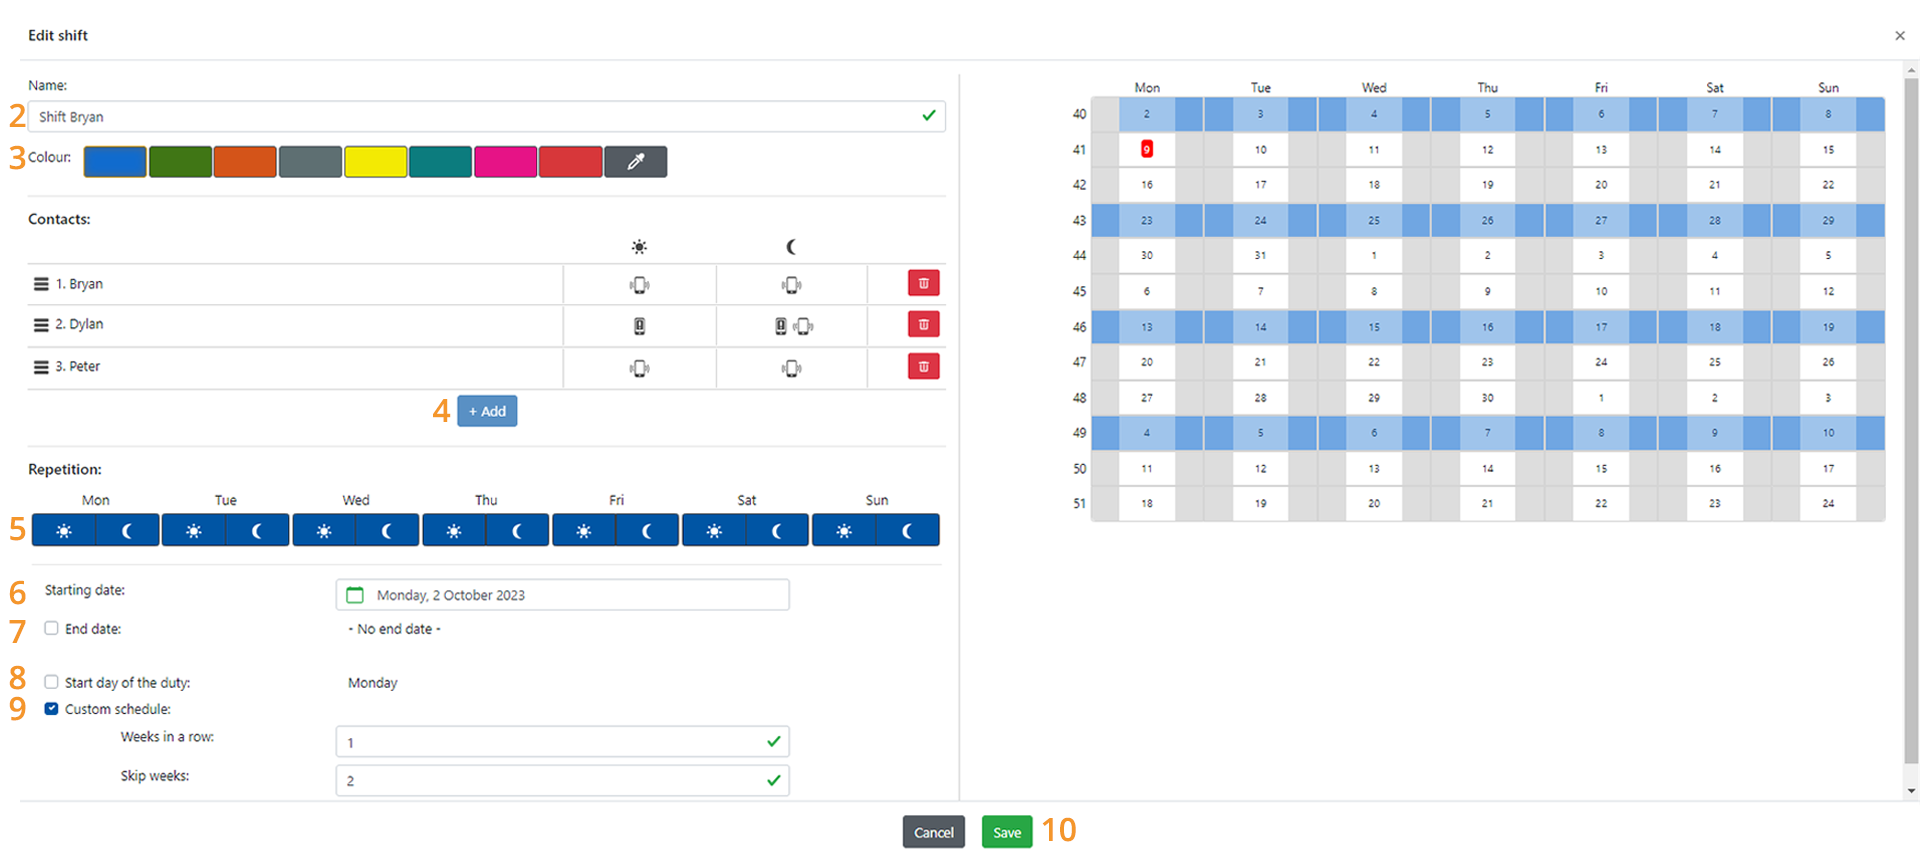
- Give the duty a logical name; in this example, Shift Bryan.
- Give the service a unique colour to ensure the distinction in shifts is easily visible. In this example, blue was chosen.
- Click
Addand set the relevant contacts as shown in the situation diagram. Calling runs from top to bottom, so the sequence is important. In this duty, Bryan is at the top. - Configure which day blocks this duty will be active. In this example, there is no distinction between Daytime, Nighttime or Weekend; we tick all day blocks.
- Set the duty start date. In this case, that is Monday of this week.
- An end date is not necessary in this case, as this service should continue indefinitely.
- The start day of the shift is Monday; so in this example, this option can be left disabled. If you want the service to start on a different day, you can set it here.
- At Custom schedule, set that this shift applies every 2 weeks:
- Weeks in a row set to 1 (because pattern changes every week);
- Skip weeks set to 2 (because there are a total of 3 contacts and thus 3 shifts).
The calendar on the right of the screen graphically displays all the settings which have been configured. This makes it easy for you check the configured settings.
- Click
Save.
Dylan’s Duty
Creating Dylan’s duty goes the same way as for Bryan’s duty. Repeat ALL the above steps by:
- setting the name Duty Dylan;
- choosing the colour green;
- starting with contact Dylan;
- again, tick all day blocks;
- entering Monday of NEXT week (one week later than the start date of Bryan’s duty).
- again no need to set an end date;
- again, no need to adjust the start day;
- Custom schedule again sets that this shift applies every 2 weeks:
- Weeks in a row set to 1 (because pattern changes every week);
- Skip weeks set to 2 (because there are a total of 3 contacts and thus 3 shifts).
- click
Save.
The duty then looks as follows:

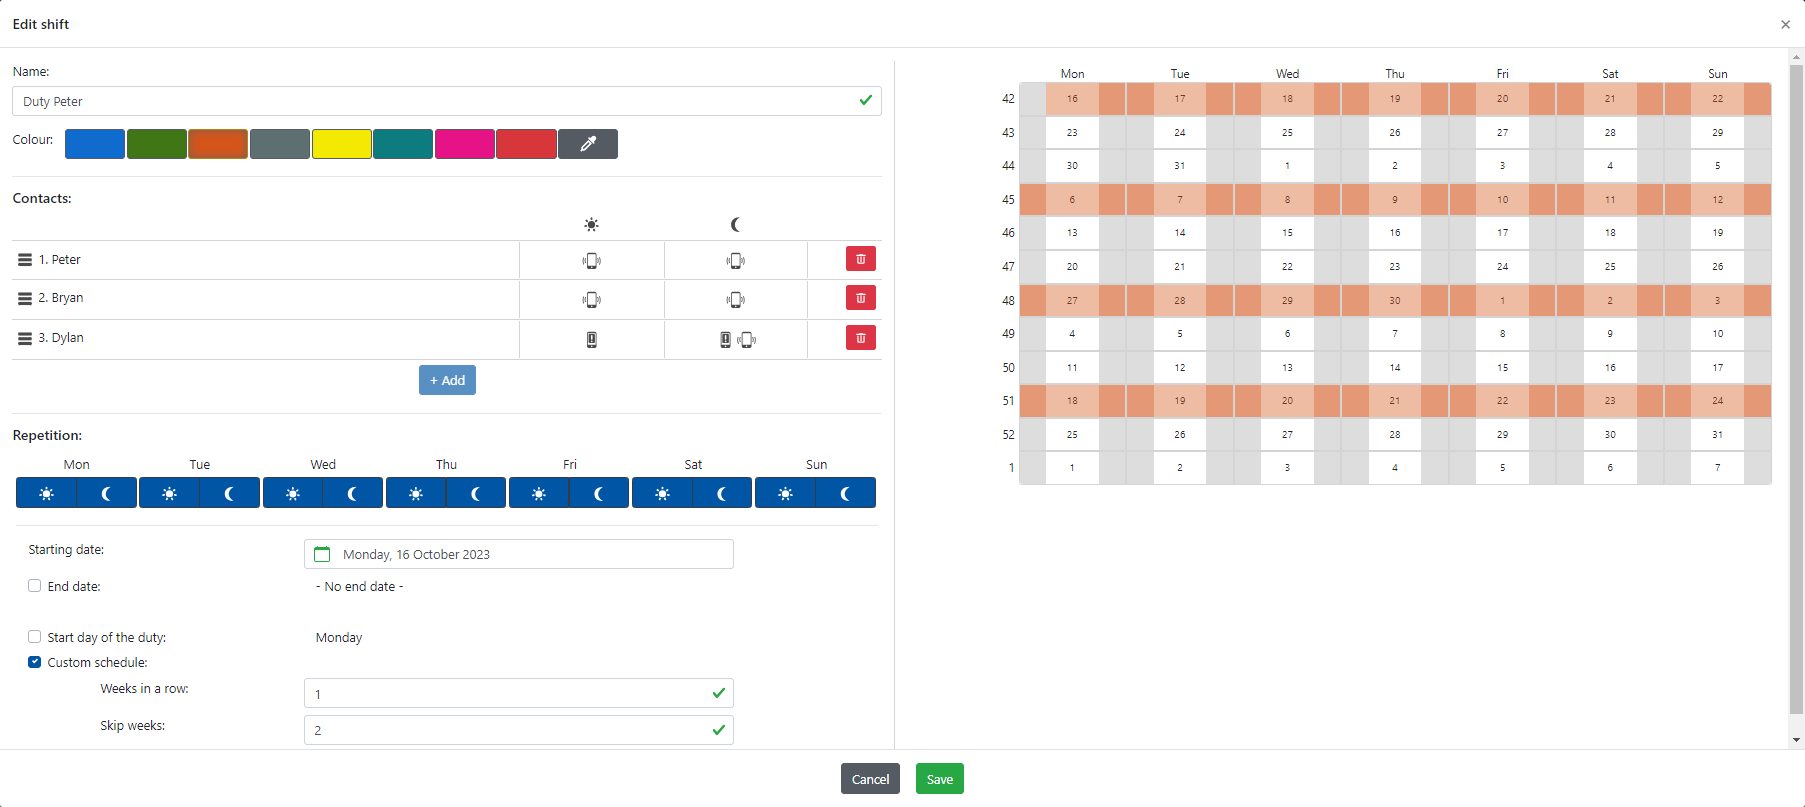
Peter's Duty
Creating Peter’s duty goes the same way. Repeat ALL the steps under Bryan’s duty,
- setting the name to Duty Peter;
- choosing the colour orange;
- starting with contact Peter;
- again, tick all day blocks;
- entering Monday of the NEXT week (one week later than the start date of Dylan’s duty).
- again no need to set an end date;
- again, no need to adjust the start day;
- Custom schedule again sets that this shift applies every 2 weeks:
- Weeks in a row set to 1 (because pattern changes every week);
- Skip weeks set to 2 (because there are a total of 3 contacts and thus 3 shifts).
- click
Save.
The duty then looks as follows:
Result of duty schedule Cultivation
The following schedule (Week overview) is created using these 3 duties:
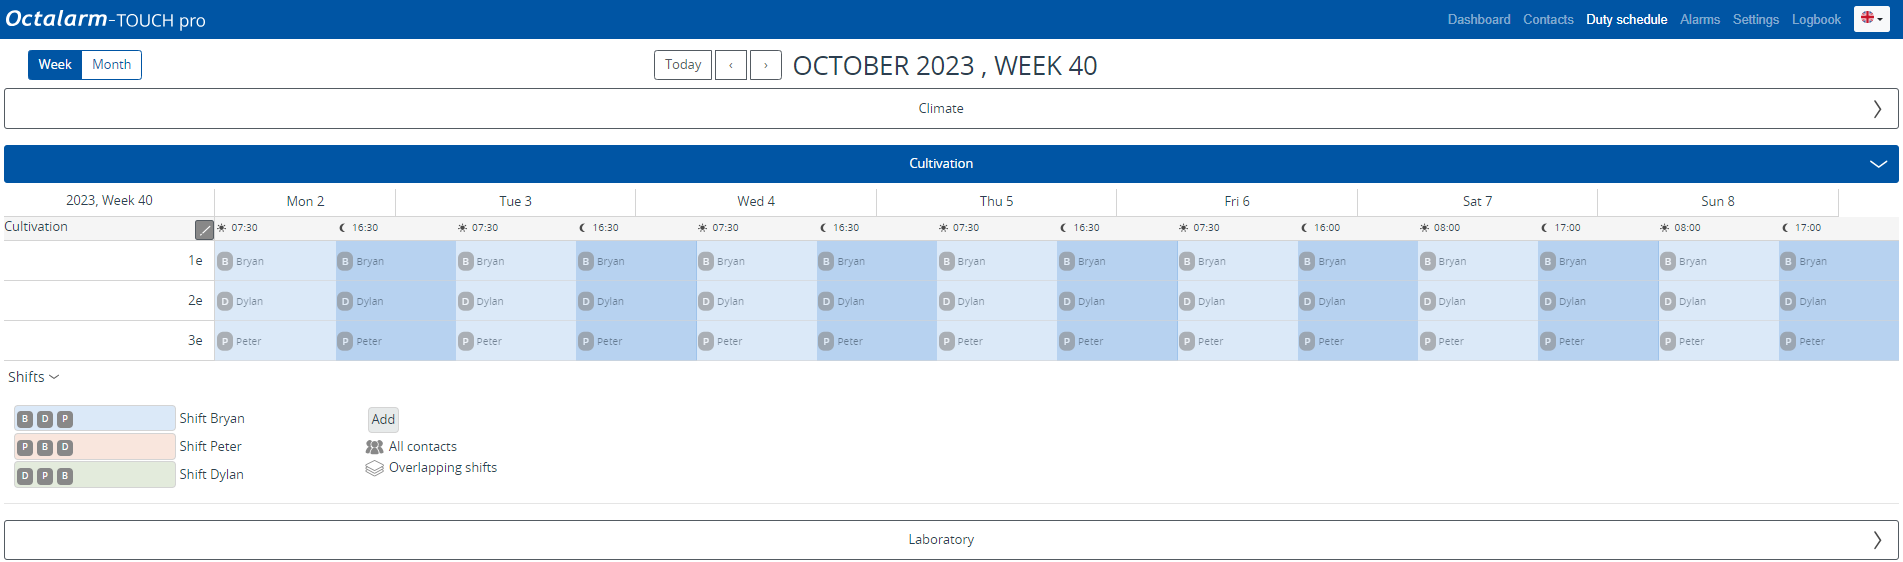
This schedule has the same pattern every day in a week, but then varies from week to week. This is particularly clear in the Month overview.
Duty schedule Laboratory
With two contacts, two duties are needed: John’s duty and Danny’s duty. Creating the shifts for the service group Laboratory is done in the same way as the shifts of the service group Cultivation. Repeat ALL the steps under Bryan’s duty,
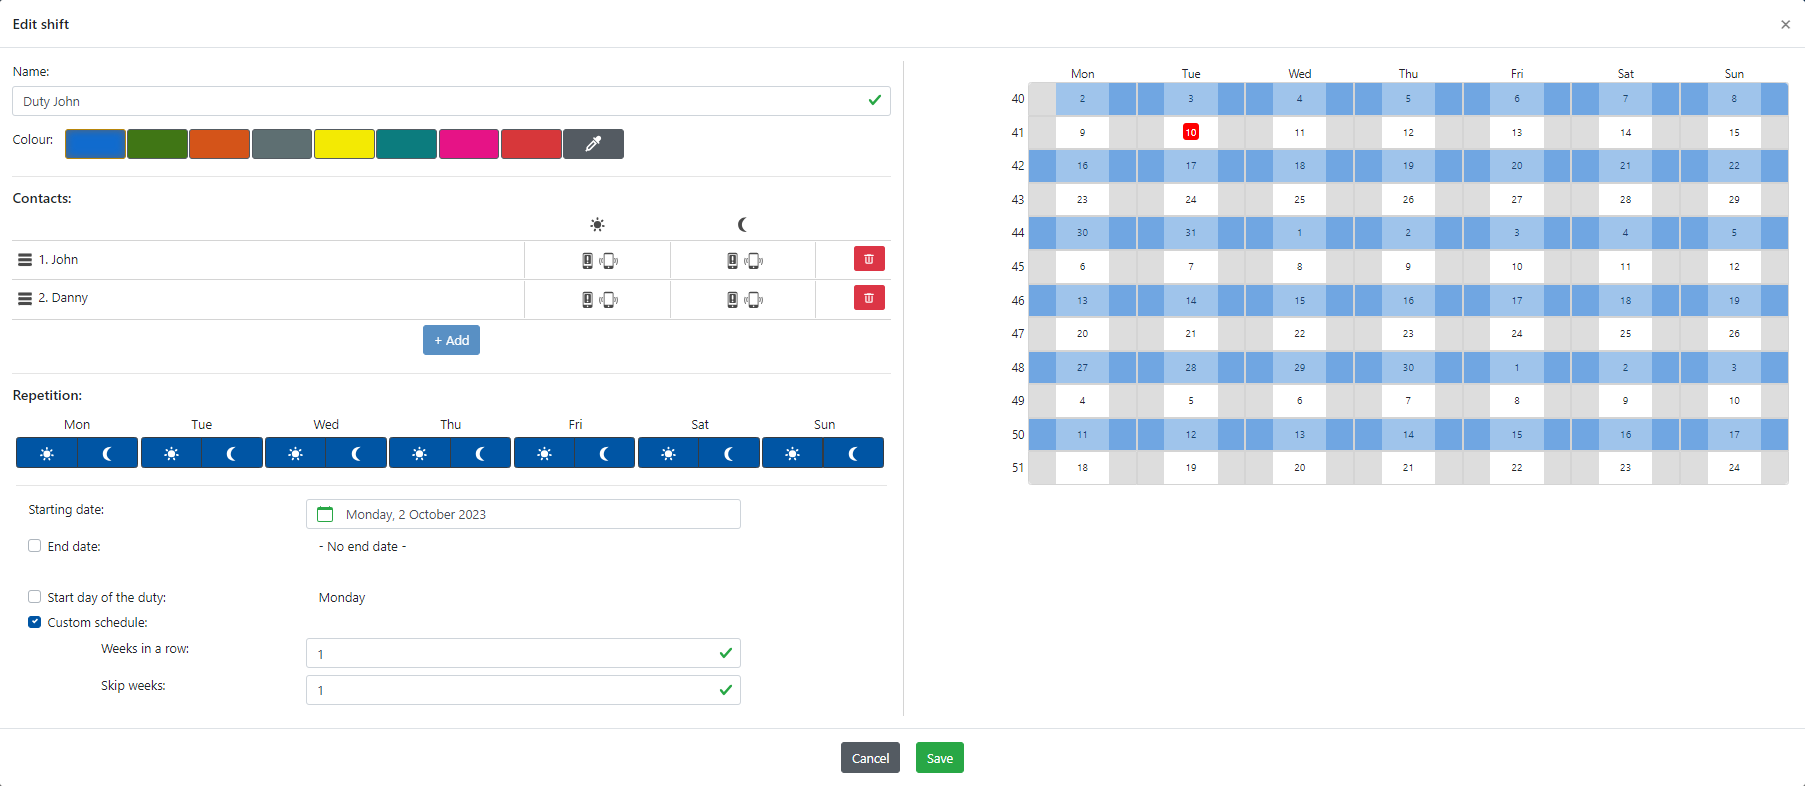
John’s Duty
- set the name Duty John;
- choosing the colour blue;
- beginning with contact John;
- again, tick all day blocks;
- setting Monday of THIS week;
- again no need to set an end date;
- again, no need to adjust the start day;
- Custom schedule sets that this duty is every other week:
- Weeks in a row set to 1 (because pattern changes every week);
- Skip weeks set to 1 (because there are a total of 2 contacts and thus 2 shifts).
The duty then looks as follows:
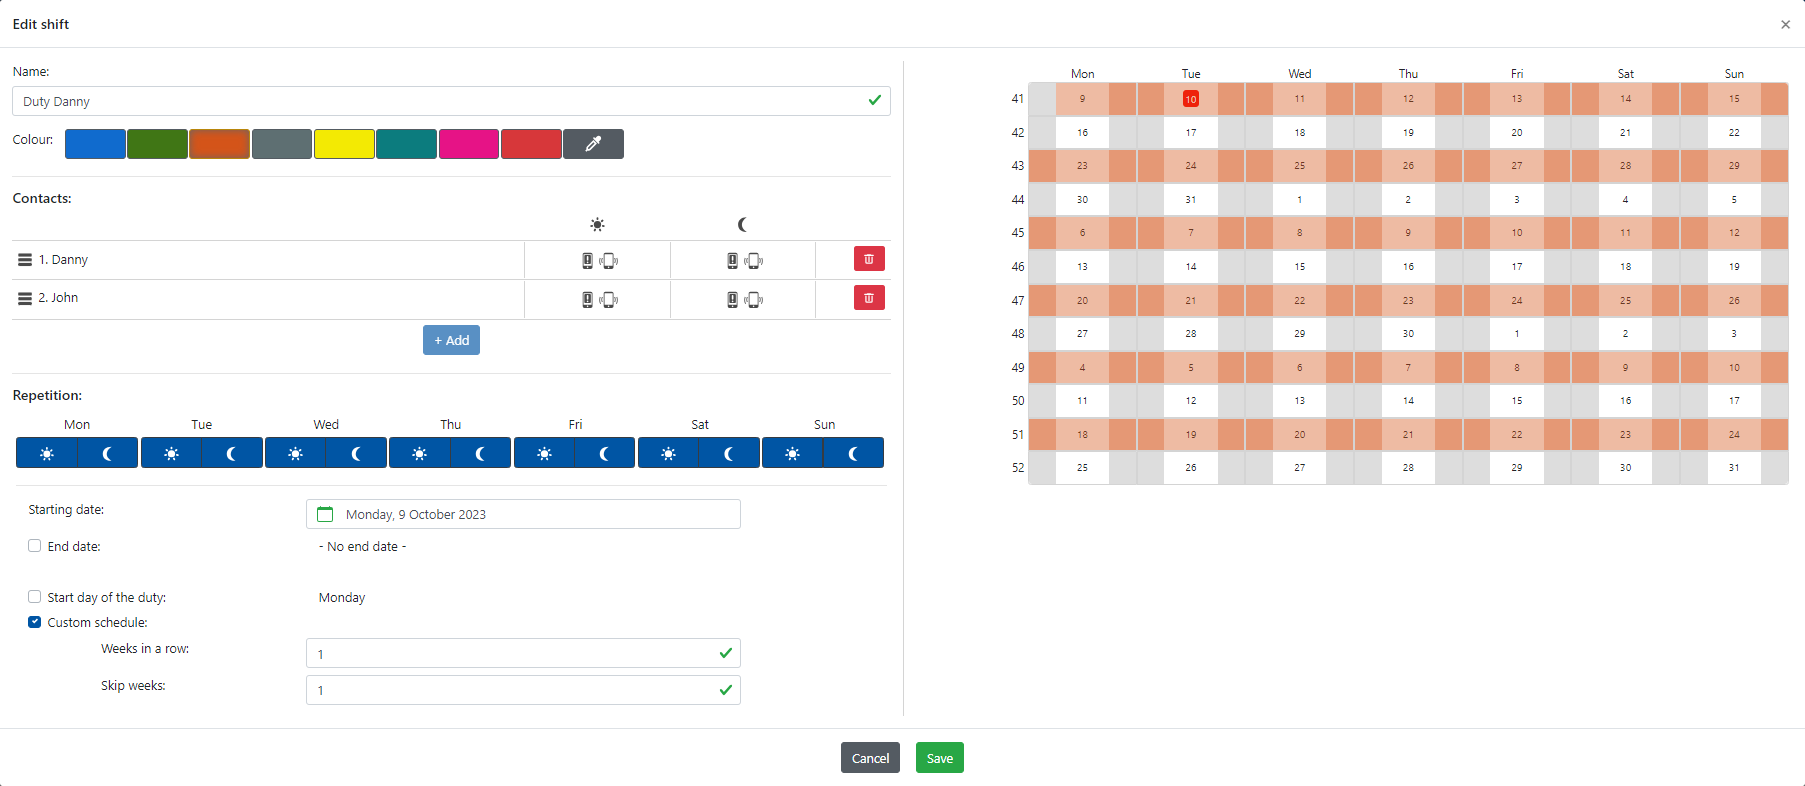
Danny’s Duty
- setting the name Duty Danny;
- choosing the colour orange;
- starting with contact Danny;
- again, tick all day blocks;
- setting Monday of NEXT week;
- again no need to set an end date;
- again, no need to adjust the start day;
- Custom schedule again sets that this shift applies every week:
- Weeks in a row set to 1 (because pattern changes every week);
- Skip weeks set to 1 (because there are a total of 2 contacts and thus 2 shifts).
The duty then looks as follows:
Result of duty schedule Laboratory
The following schedule (Week overview) is created using these 2 duties:
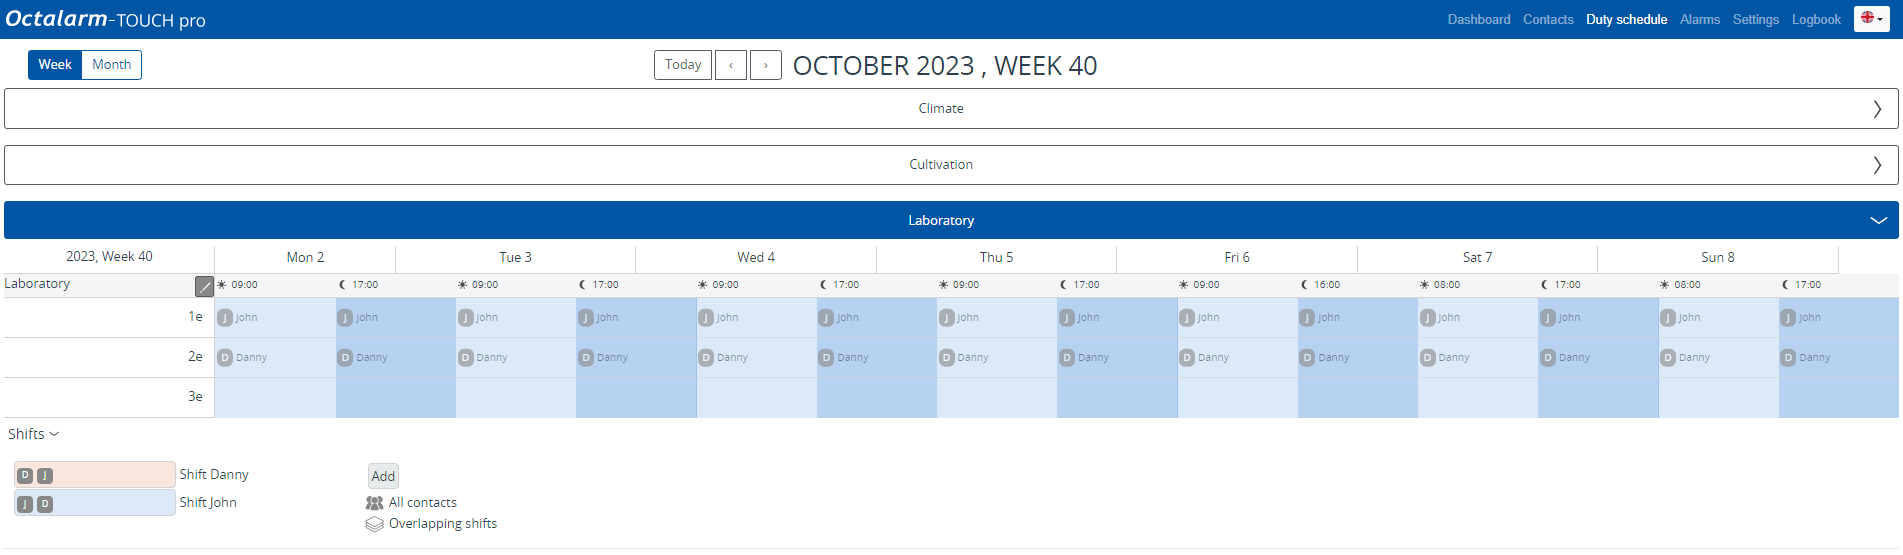
This schedule has the same pattern every day in a week, but then varies from week to week. This is particularly clear in the Month overview.

Good to know:
1. Changing a duty retrospectively:
option 1: click on an already existing duty in the calendar, make the desired changes and clickSave.
option 2: at the legend, click on a duty, clickEdit, make the desired changes and clickSave.
2. Clicking>behind Duties in the legend will display the names of the services and an explanation of symbols.
3. For overlapping shifts in the calendar, right-clicking on the Overlapping shifts symbol makes it easy to which duties are set. The first duty mentioned is active.